
Facial Expression and Art: How to create an expression using clay
In this article, I combine two areas—art and nonverbal communication. If you aren’t interested in art, you can still learn about facial expressions in the first part of the article and skip the challenges. Watch the video introducing emotion and facial expression, then read on and see the diagrams to learn about facial expressions. For creatives and those who are game for a creative challenge, Part Two is a tutorial on creating an emotional expression using clay.
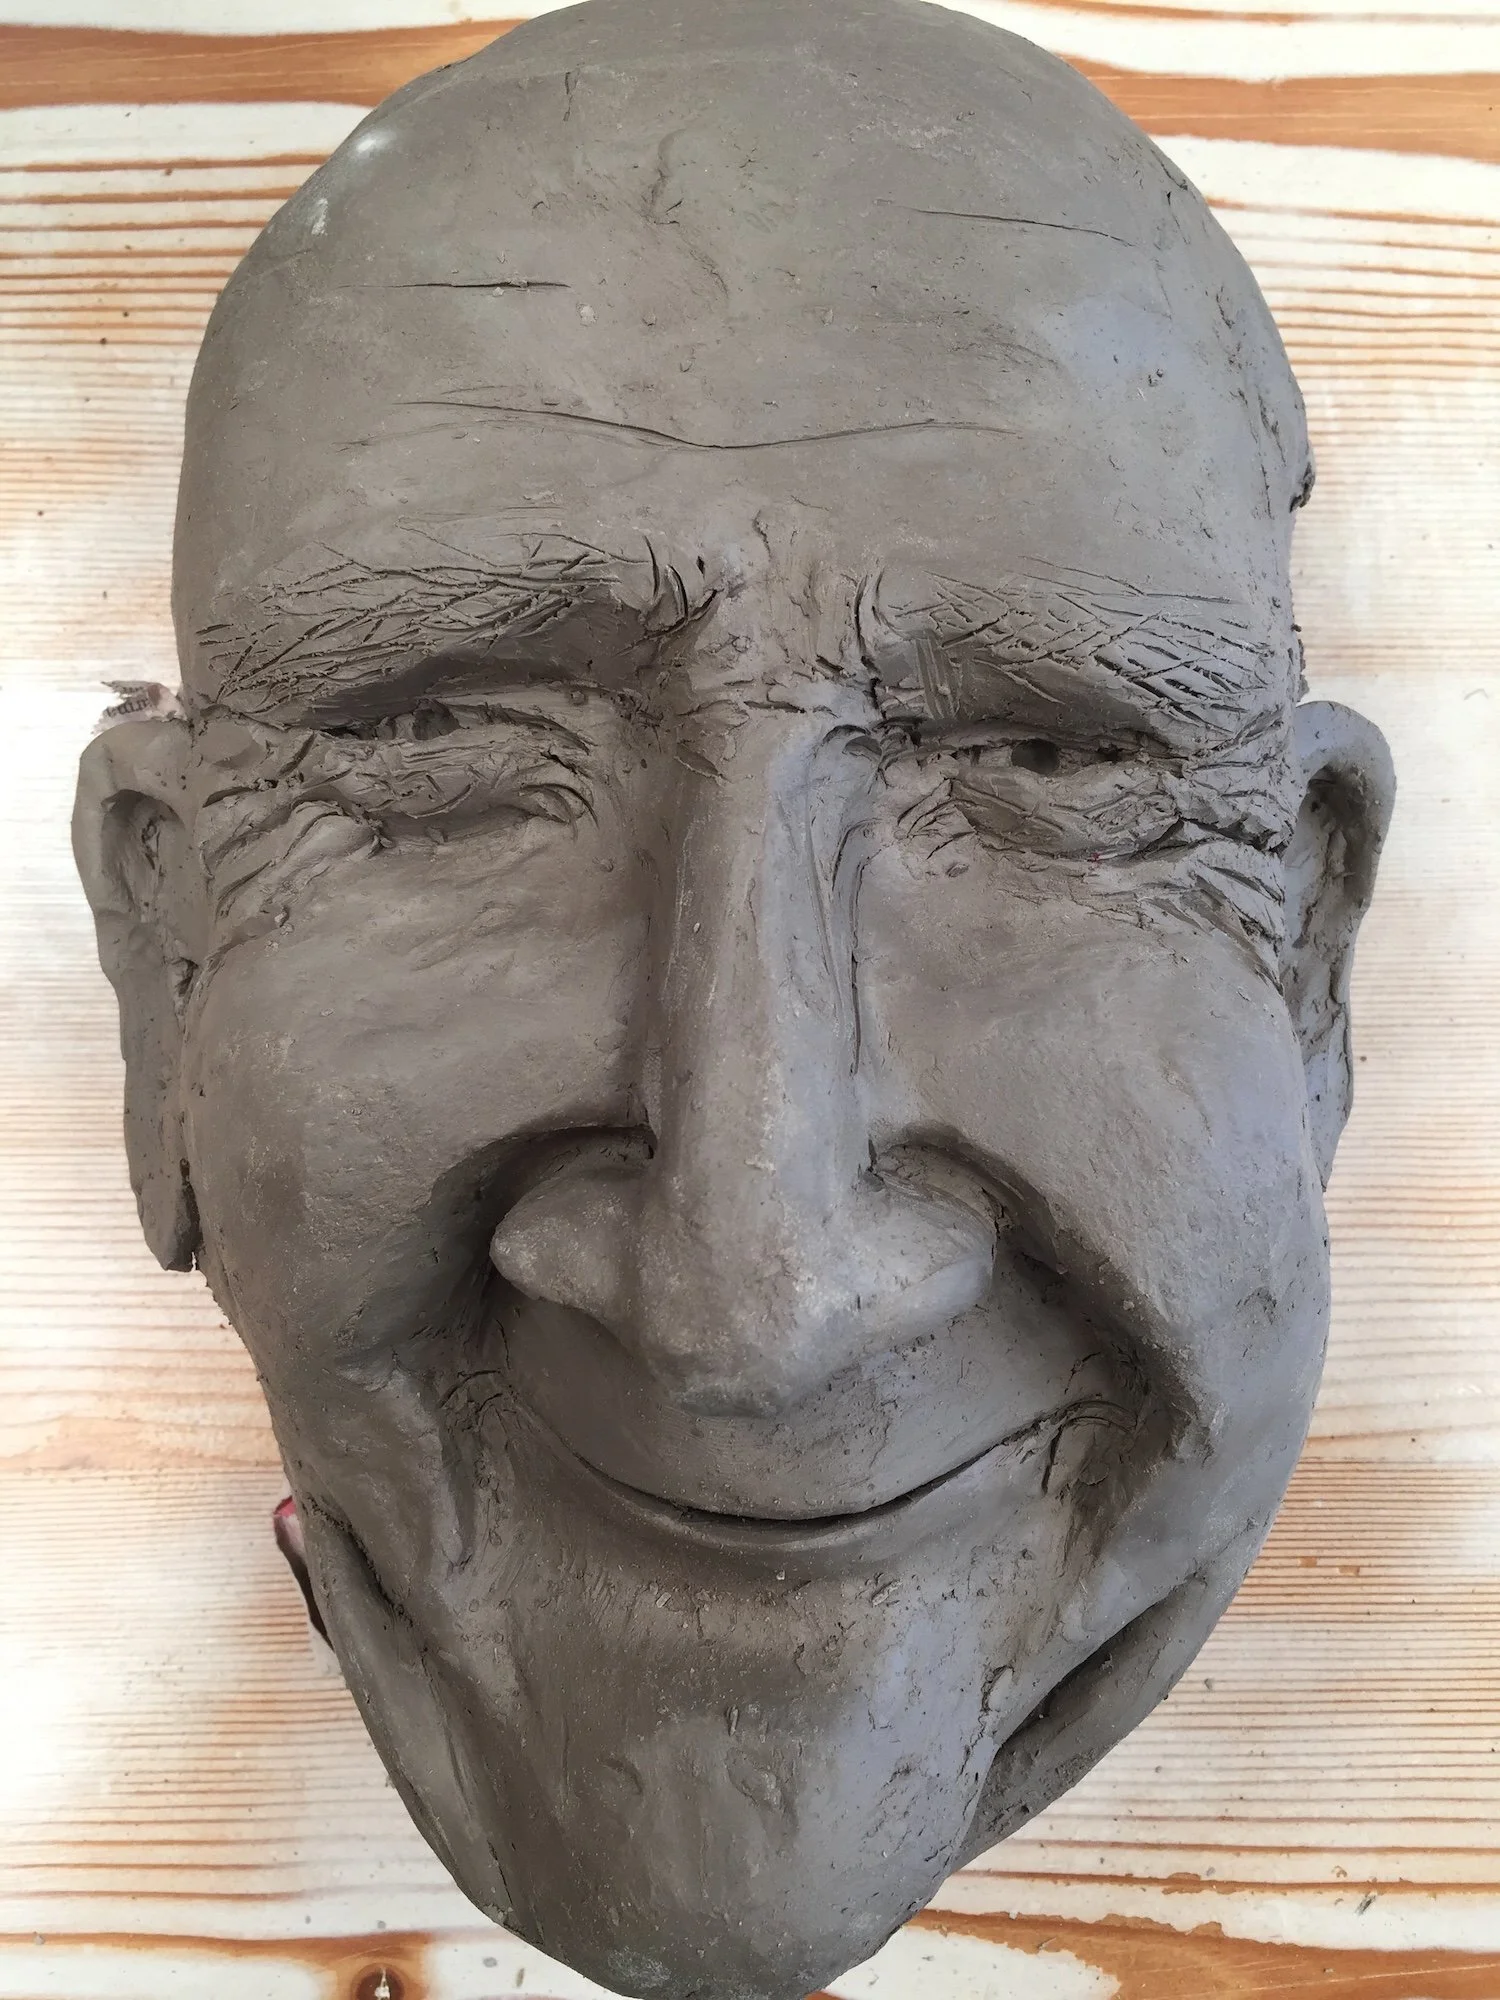
Expression of Happiness in Clay
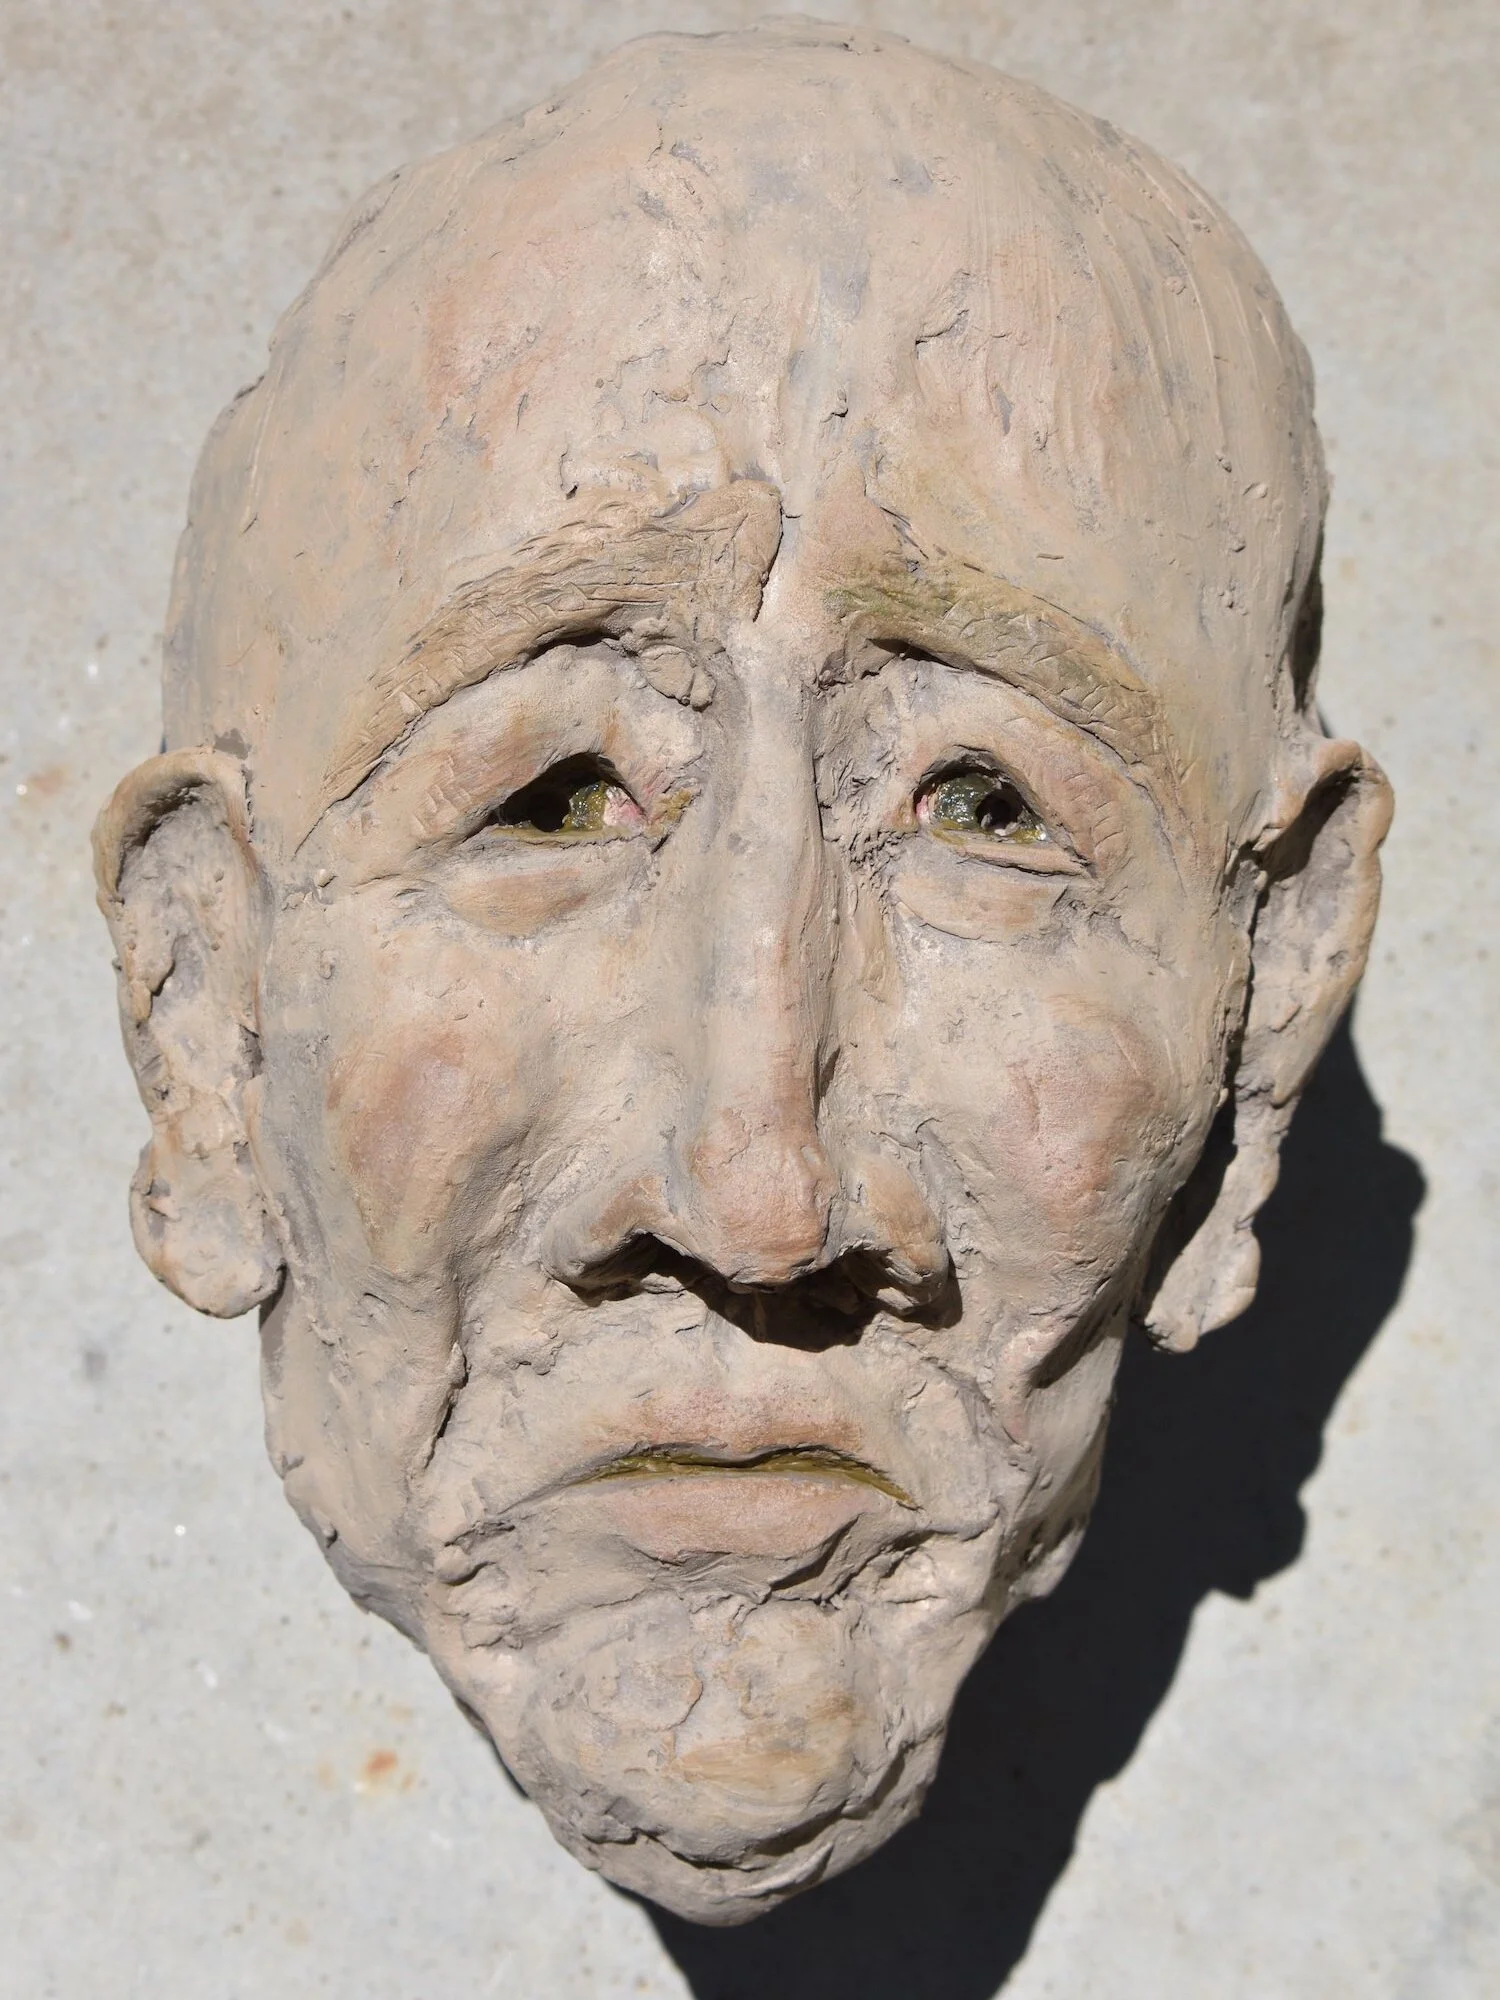
Expression of Sadness in Clay

Expression of Fear in Clay (Unfinished)
Step 1
Facial Expressions of Emotion
Watch the video for an introduction and explanation of facial expressions.
Our understanding of facial expression comes from scientists studying the face and emotion through muscles and action units.
Step 2
SEVEN UNIVERSAL EXPRESSIONS OF EMOTION
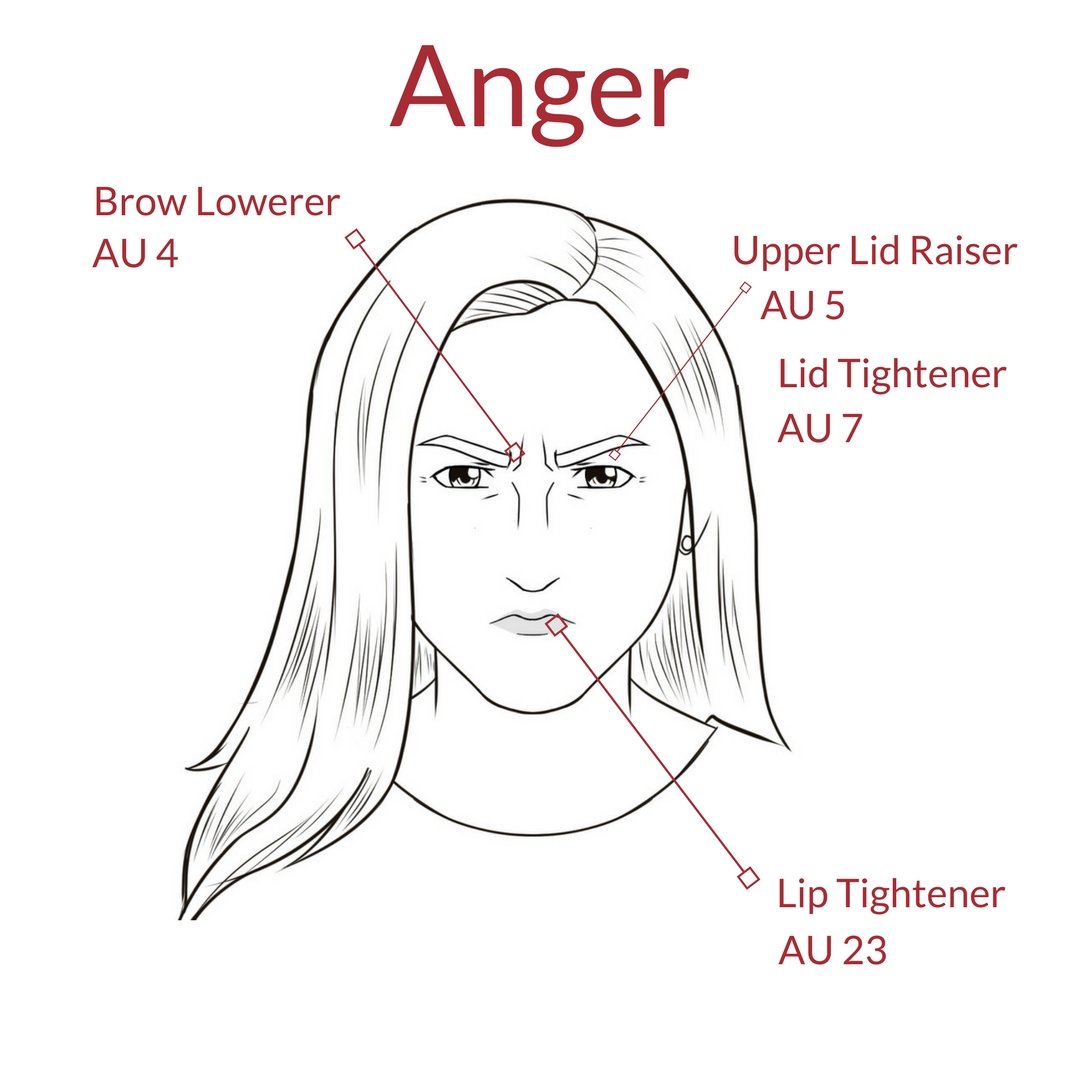
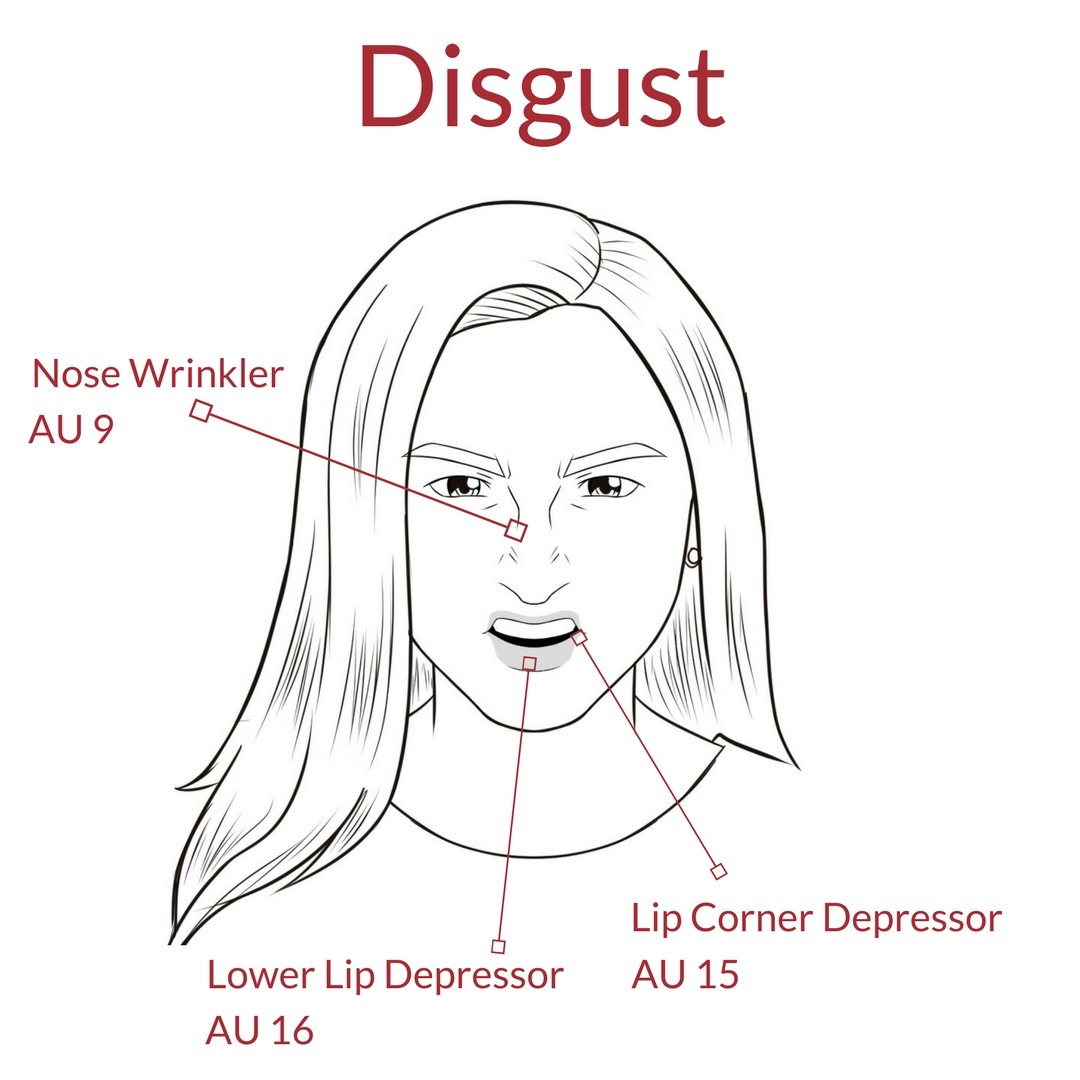
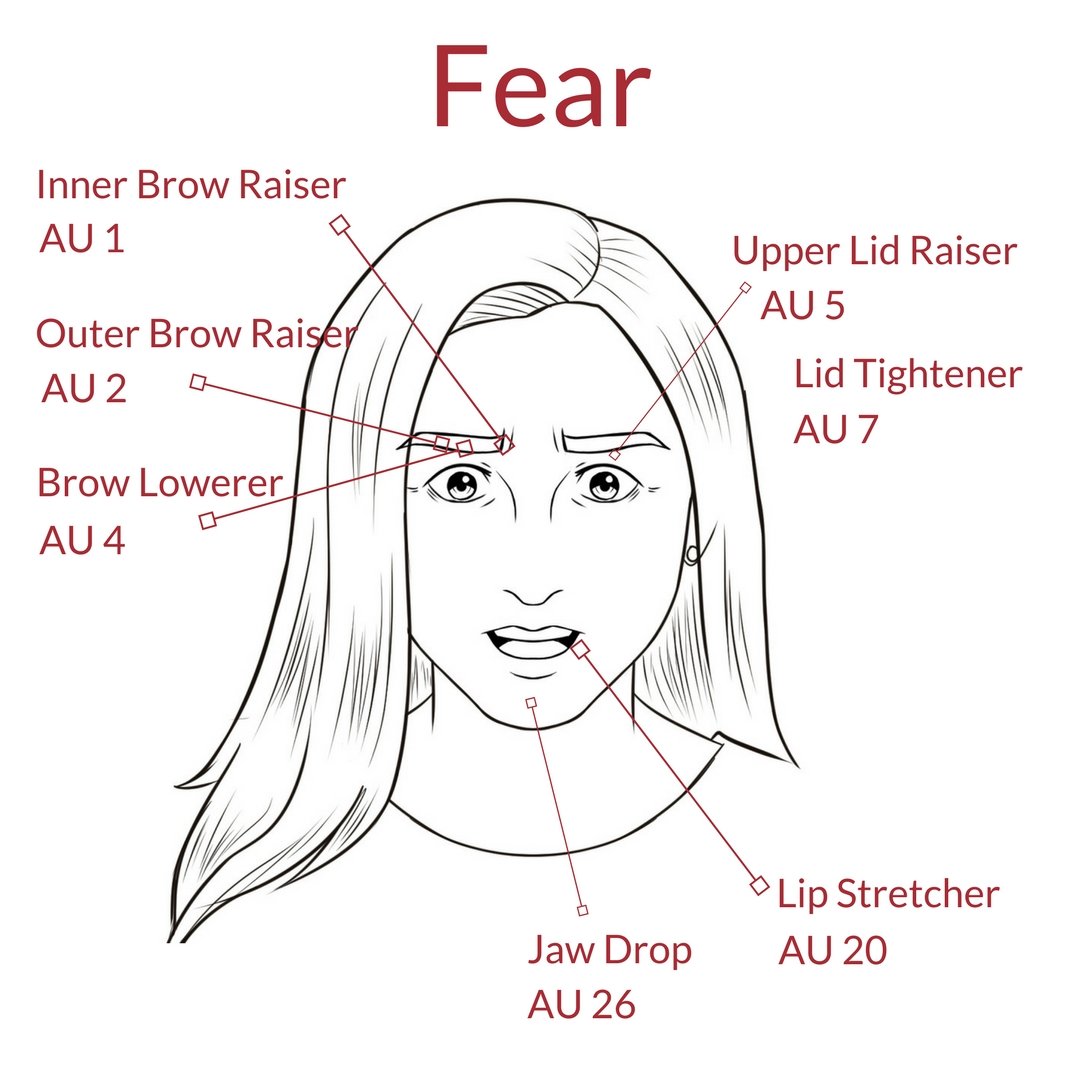
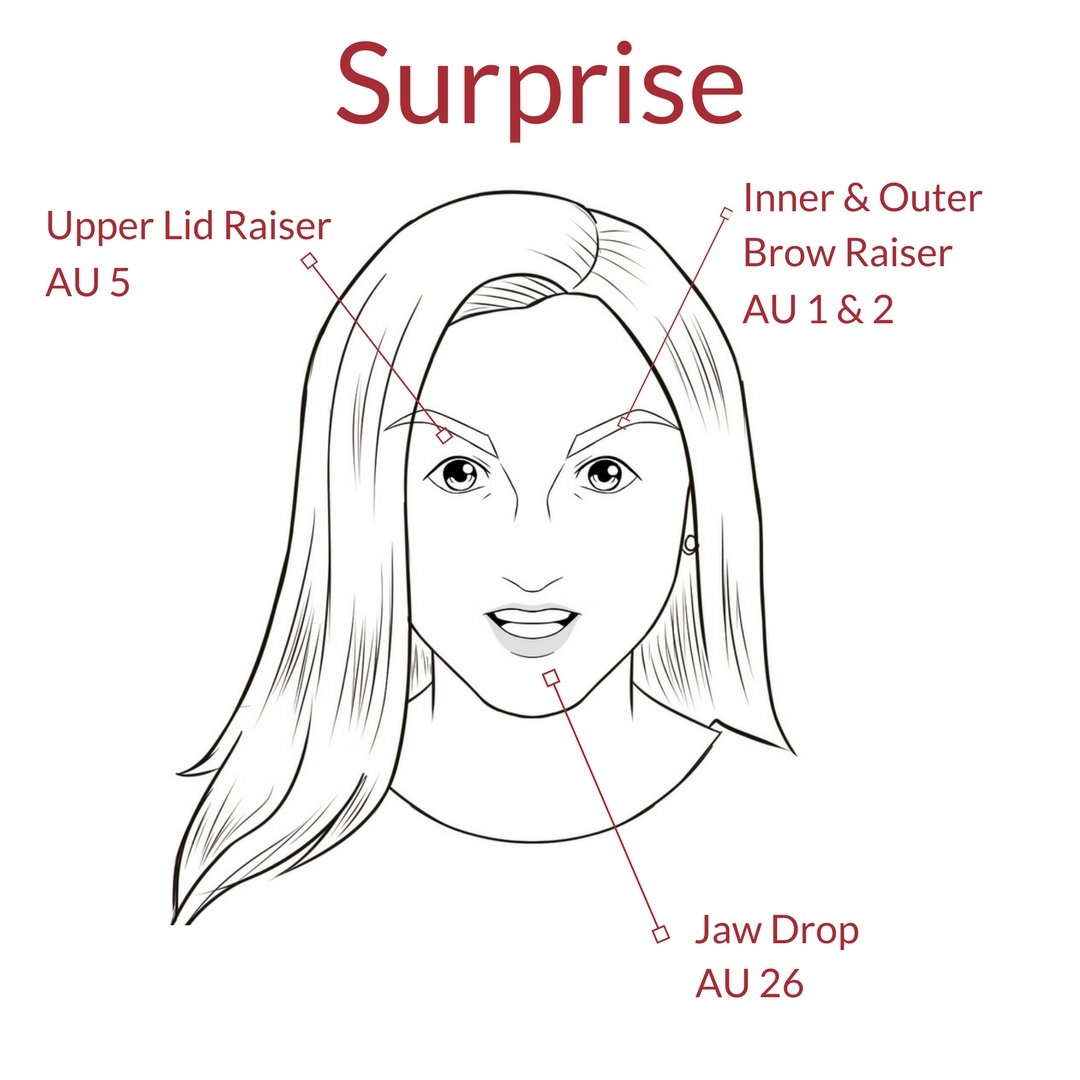
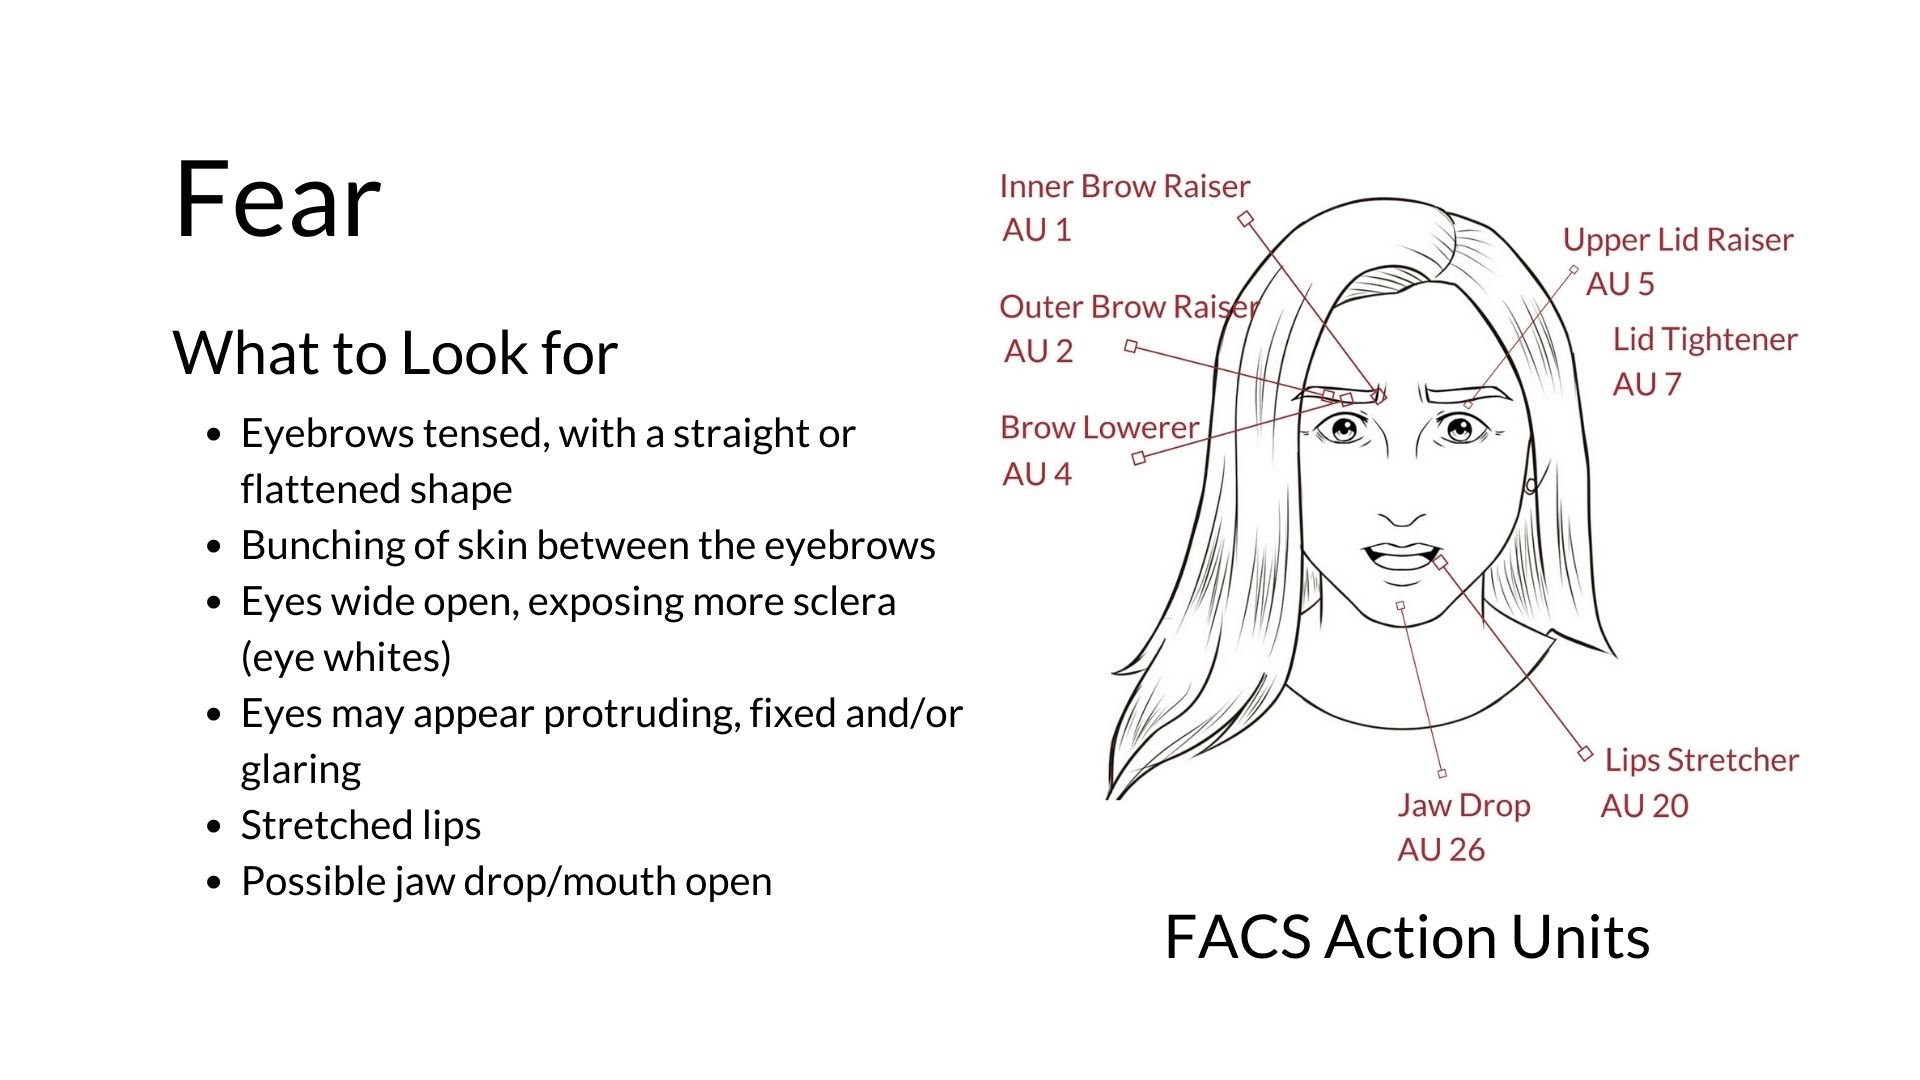
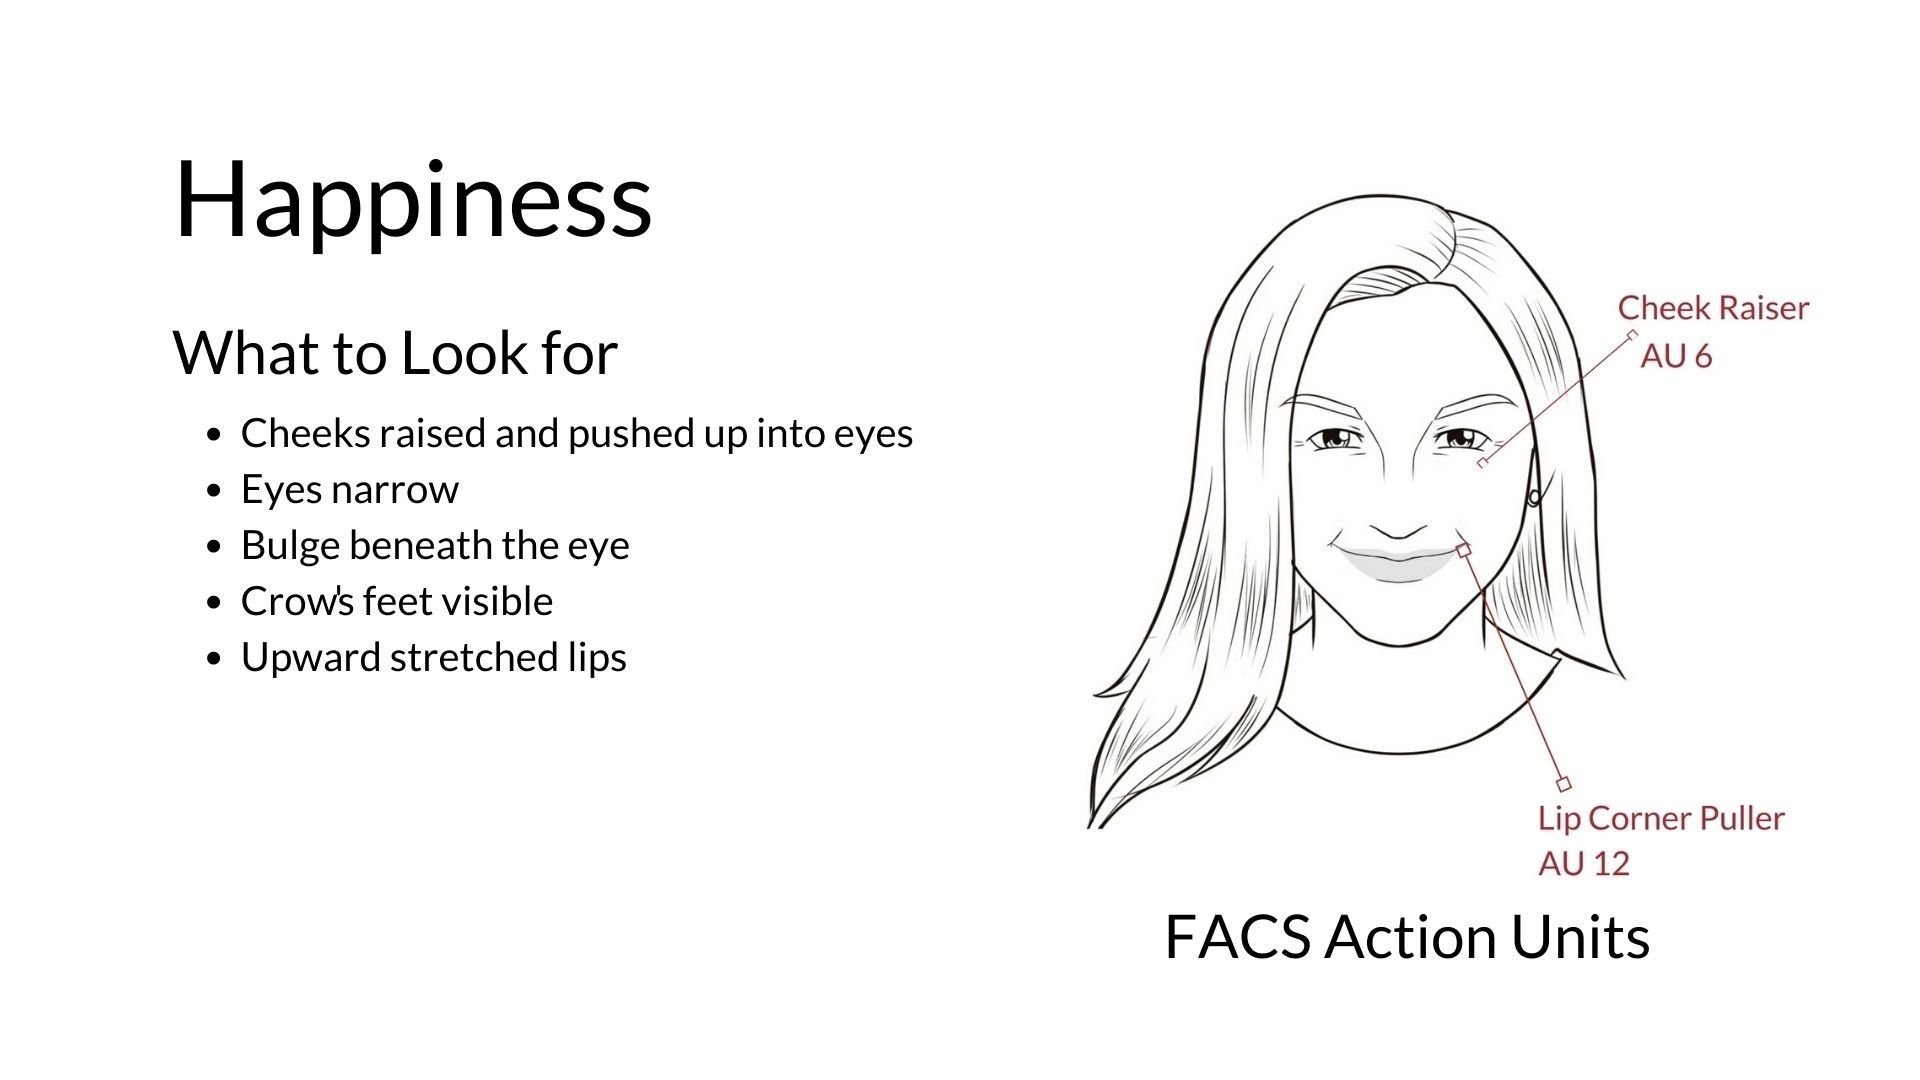
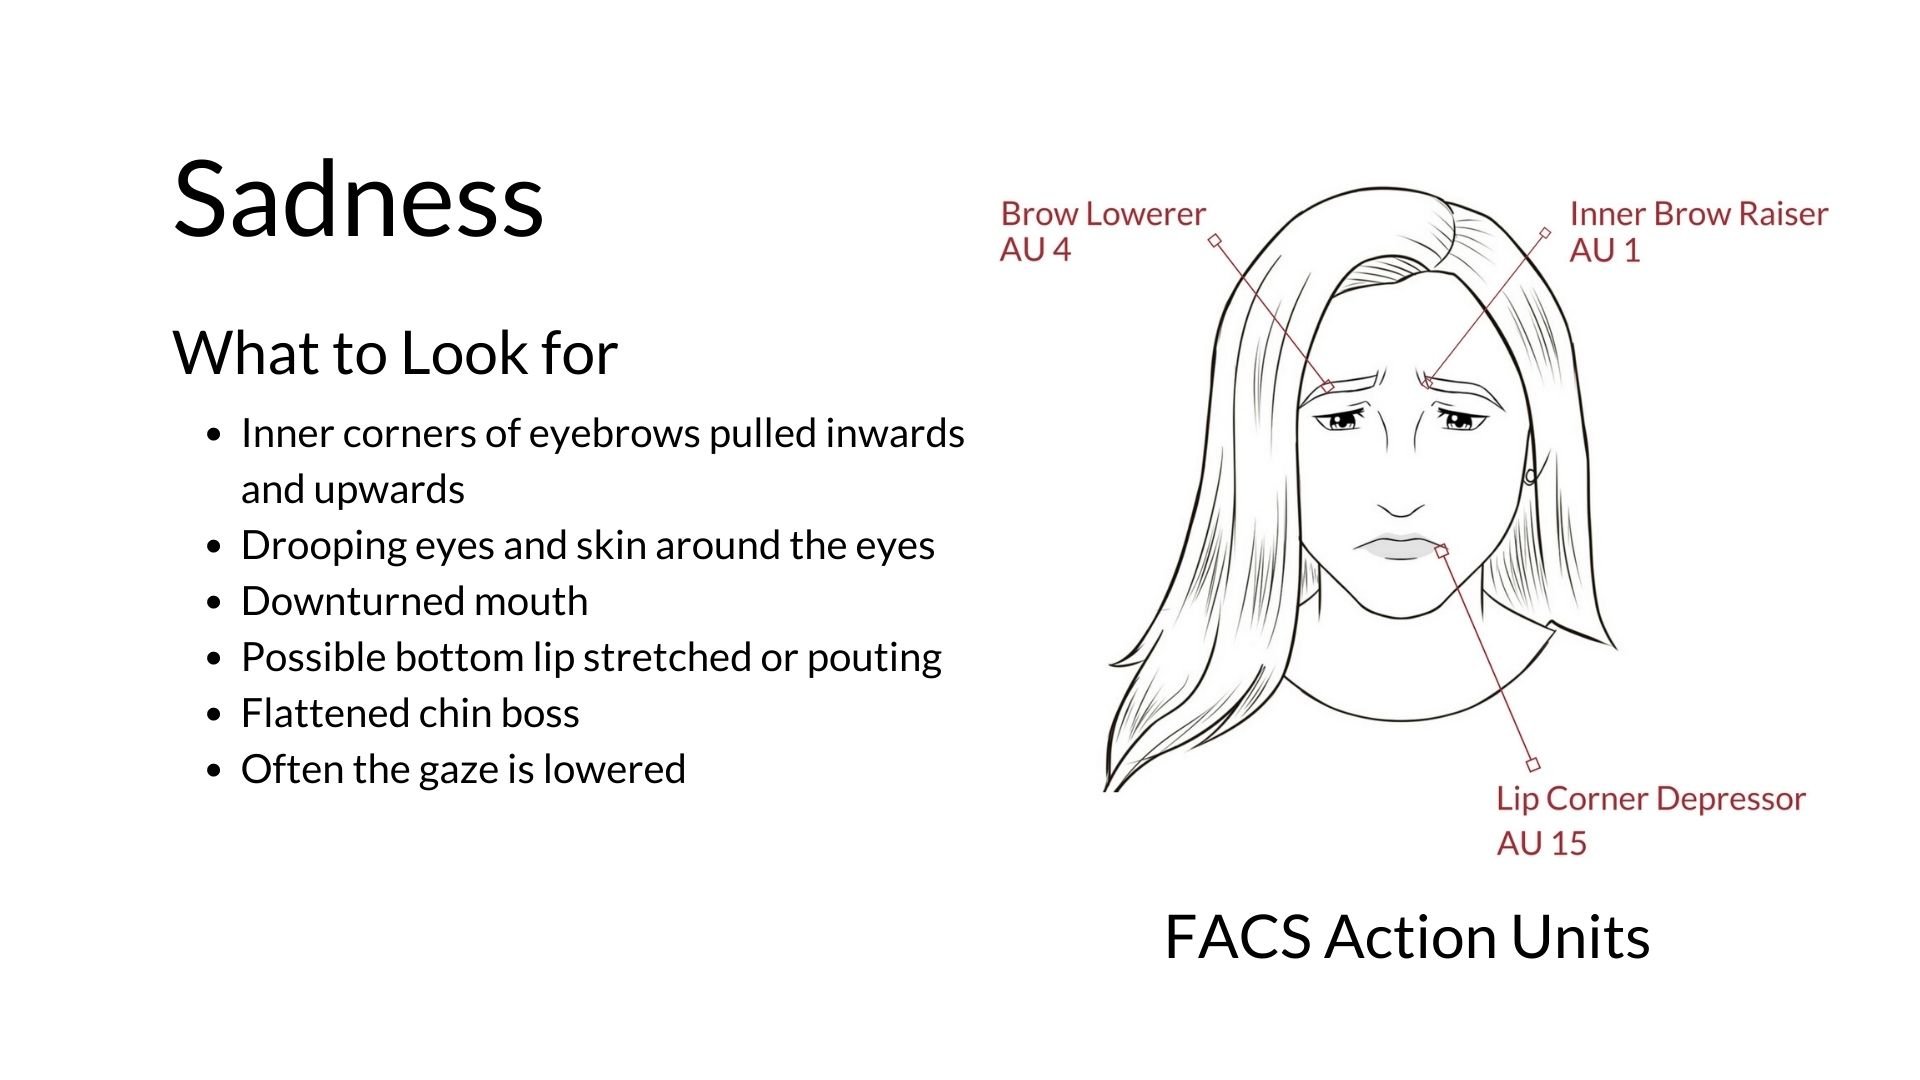
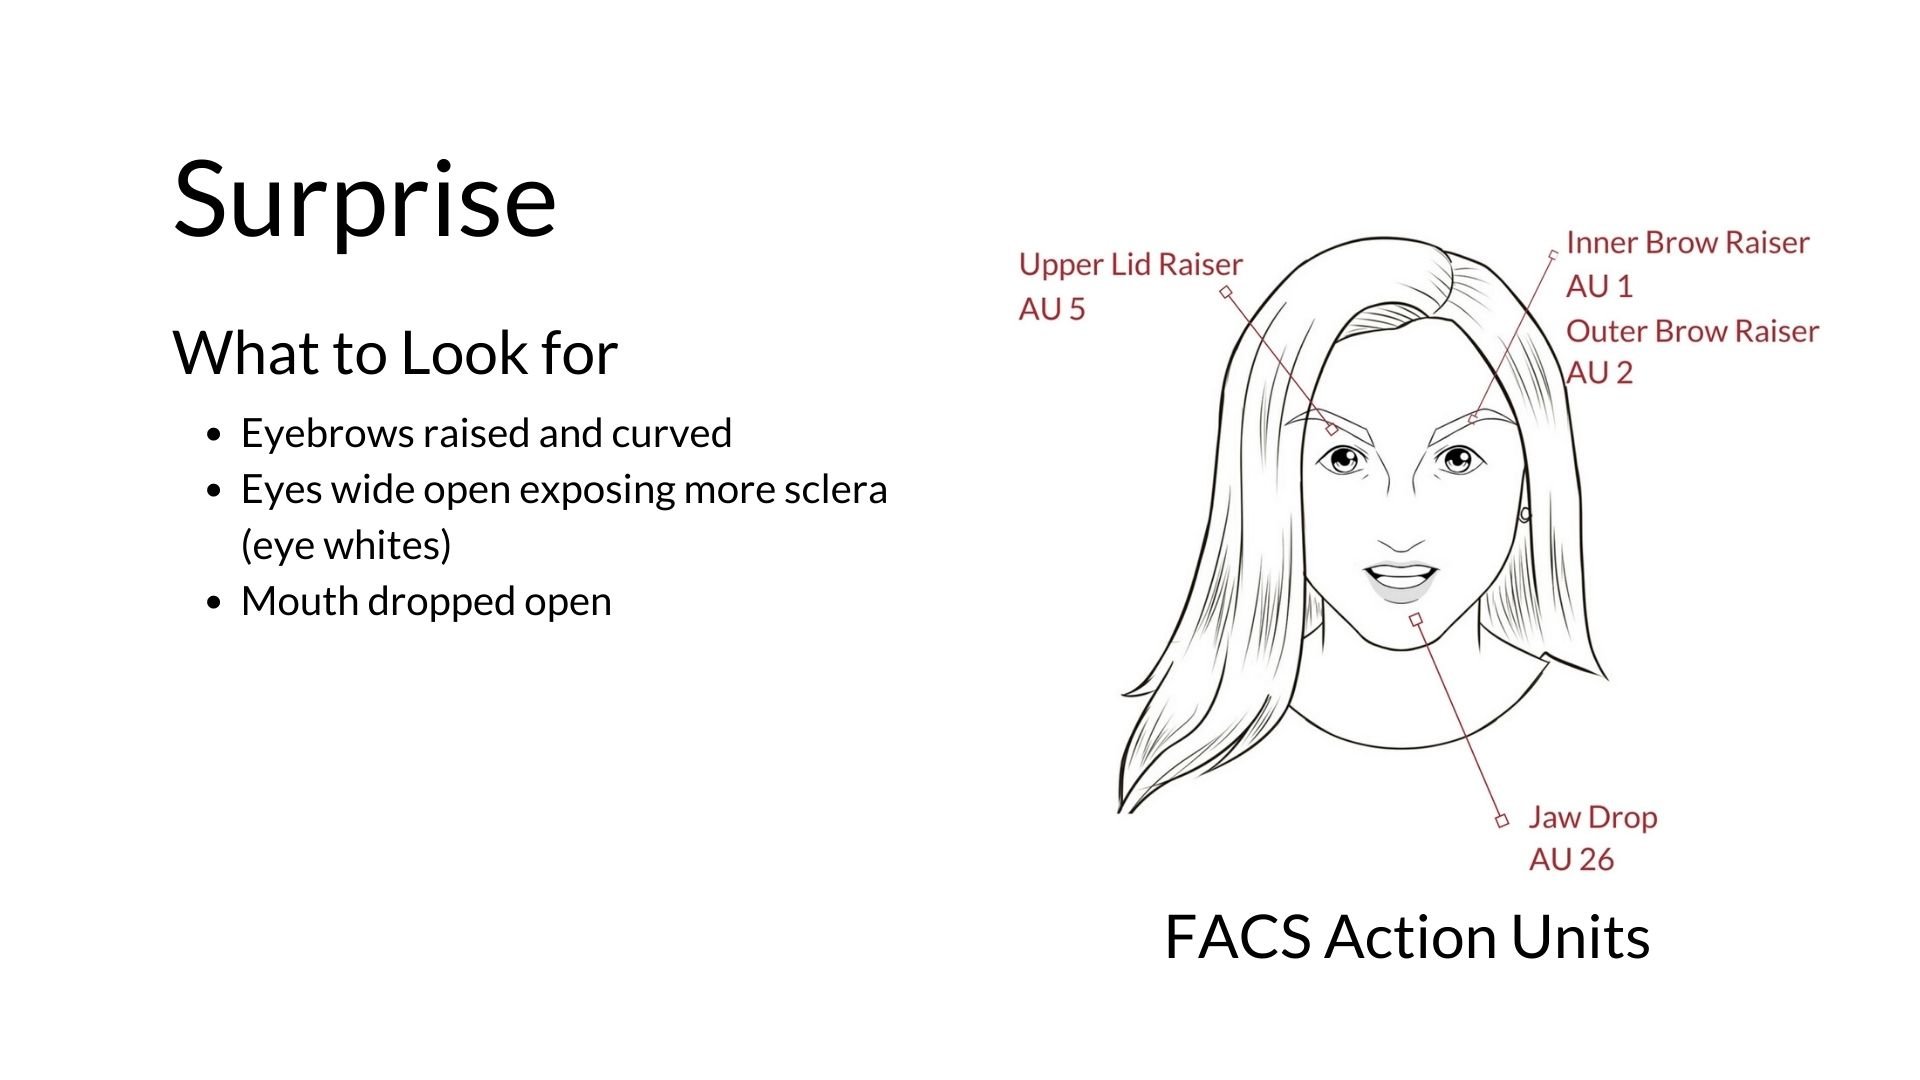
When an emotion is expressed, specific muscles are activated to create a movement. We call these Action Units (AUs). Some movements/action units involve only one muscle; others involve two or more.
Most people don’t have to know which muscles are activated or the action unit numbers. What is important is what the expression looks like and what general movements take place on the face.
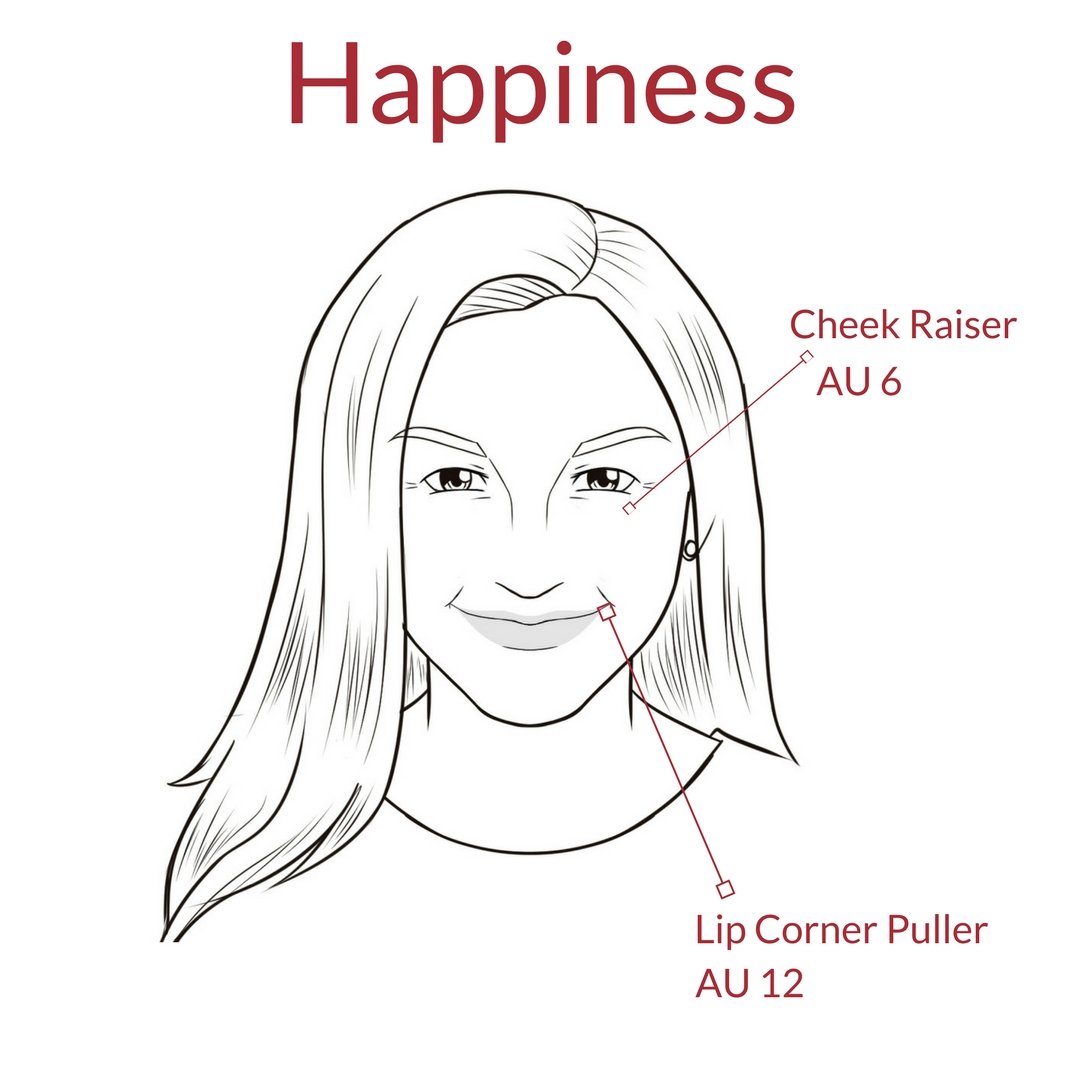
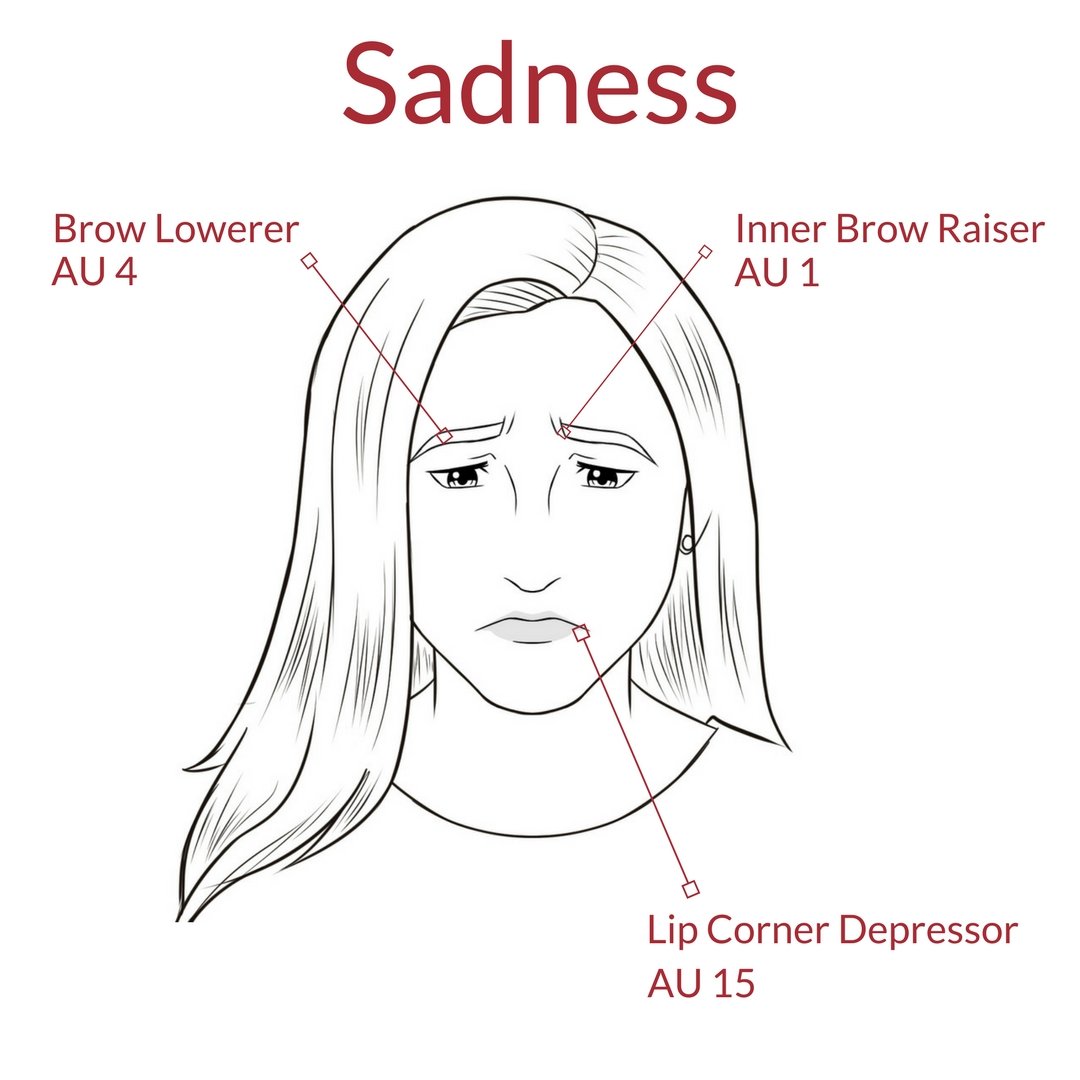
Look at the diagrams of the seven facial expressions.
You don’t need to learn all of these, but you might find it helpful to learn what happens in one or two expressions–happiness and sadness are excellent places to start.
Step 3
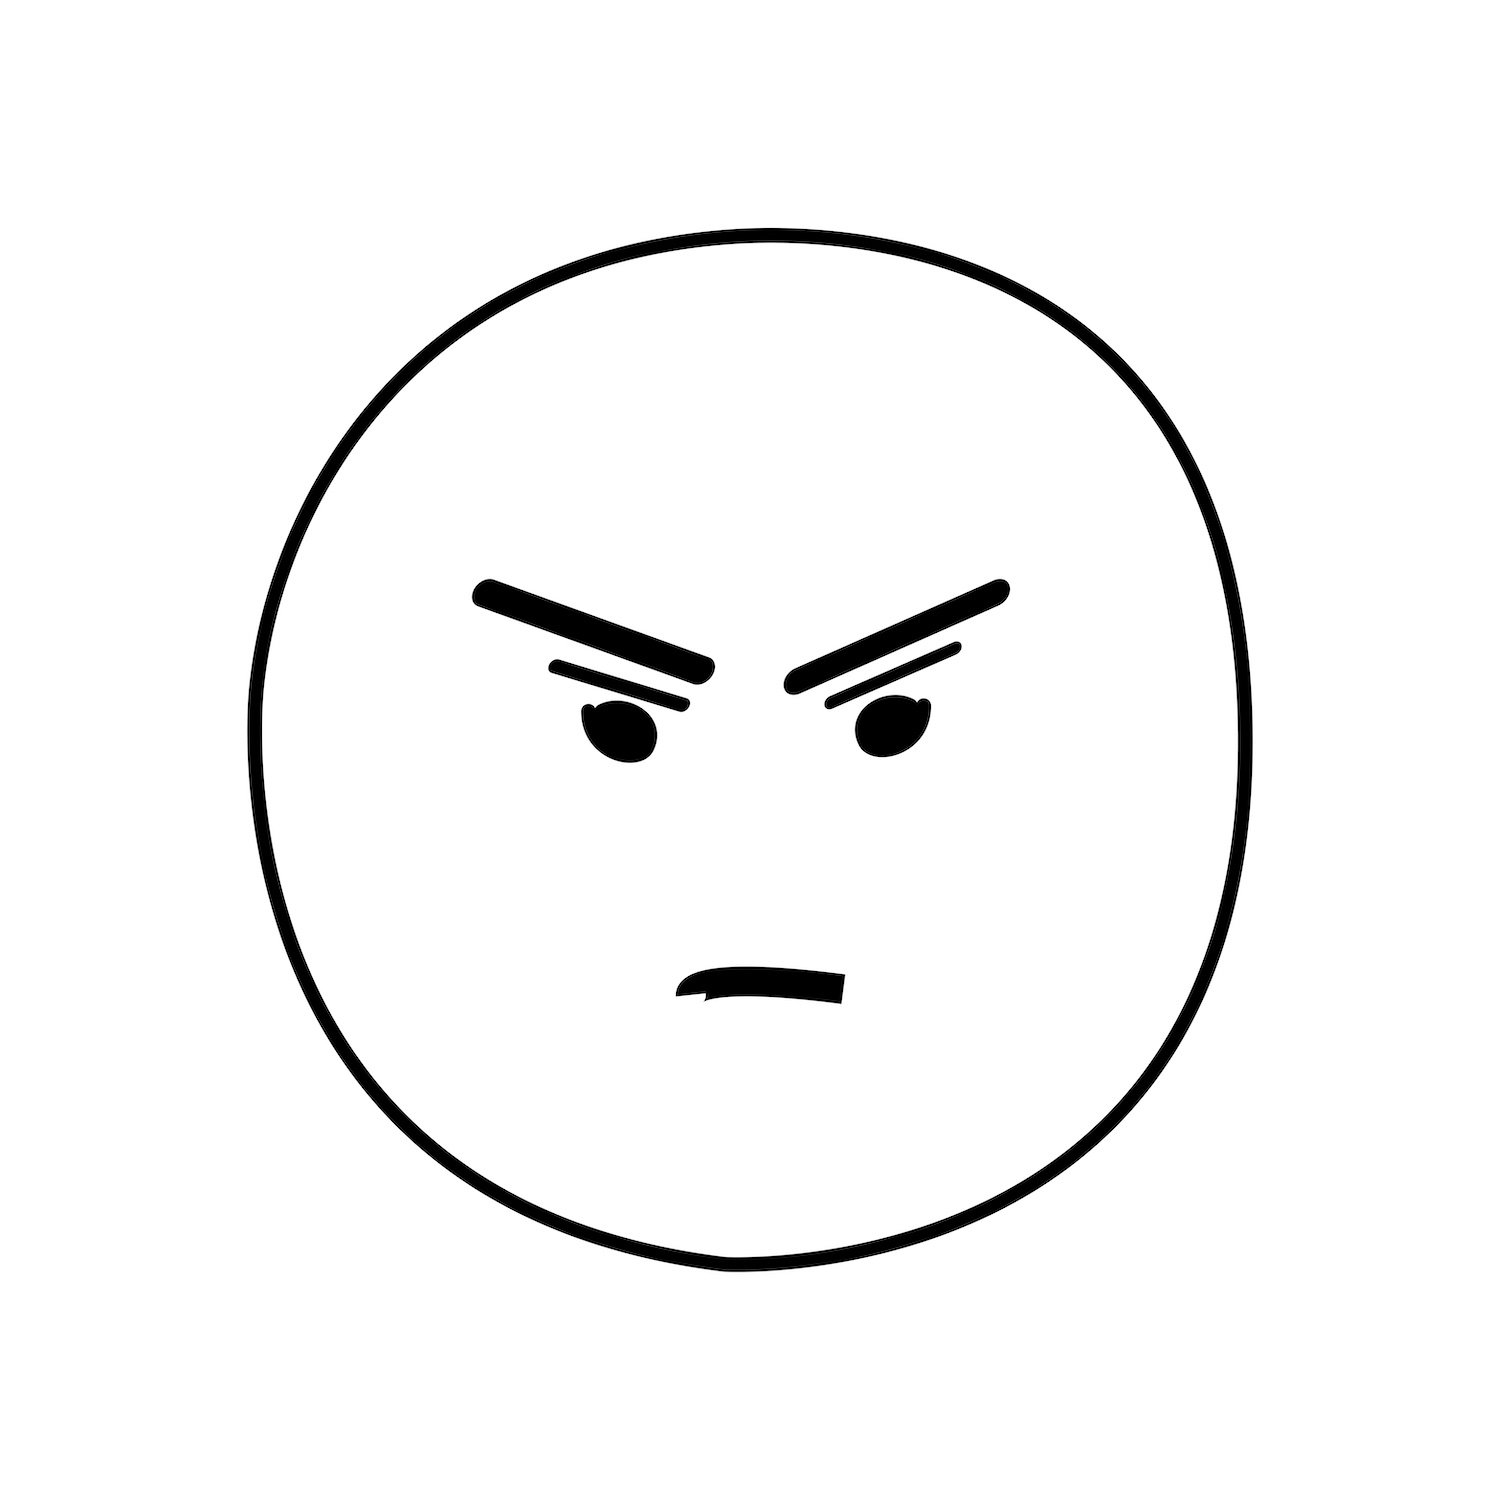
EMOJi
Emojis are used to add feelings to written text. They add another layer of communication when we’re not present to show the expression on our faces.
Emojis are designed to represent expressions accurately; however, for them to be recognised and read quickly and easily, they need to be very simple, with minimal features like eyes and a mouth. Emoji designers learn about facial expressions and muscle movements/action units to capture emotional expression.
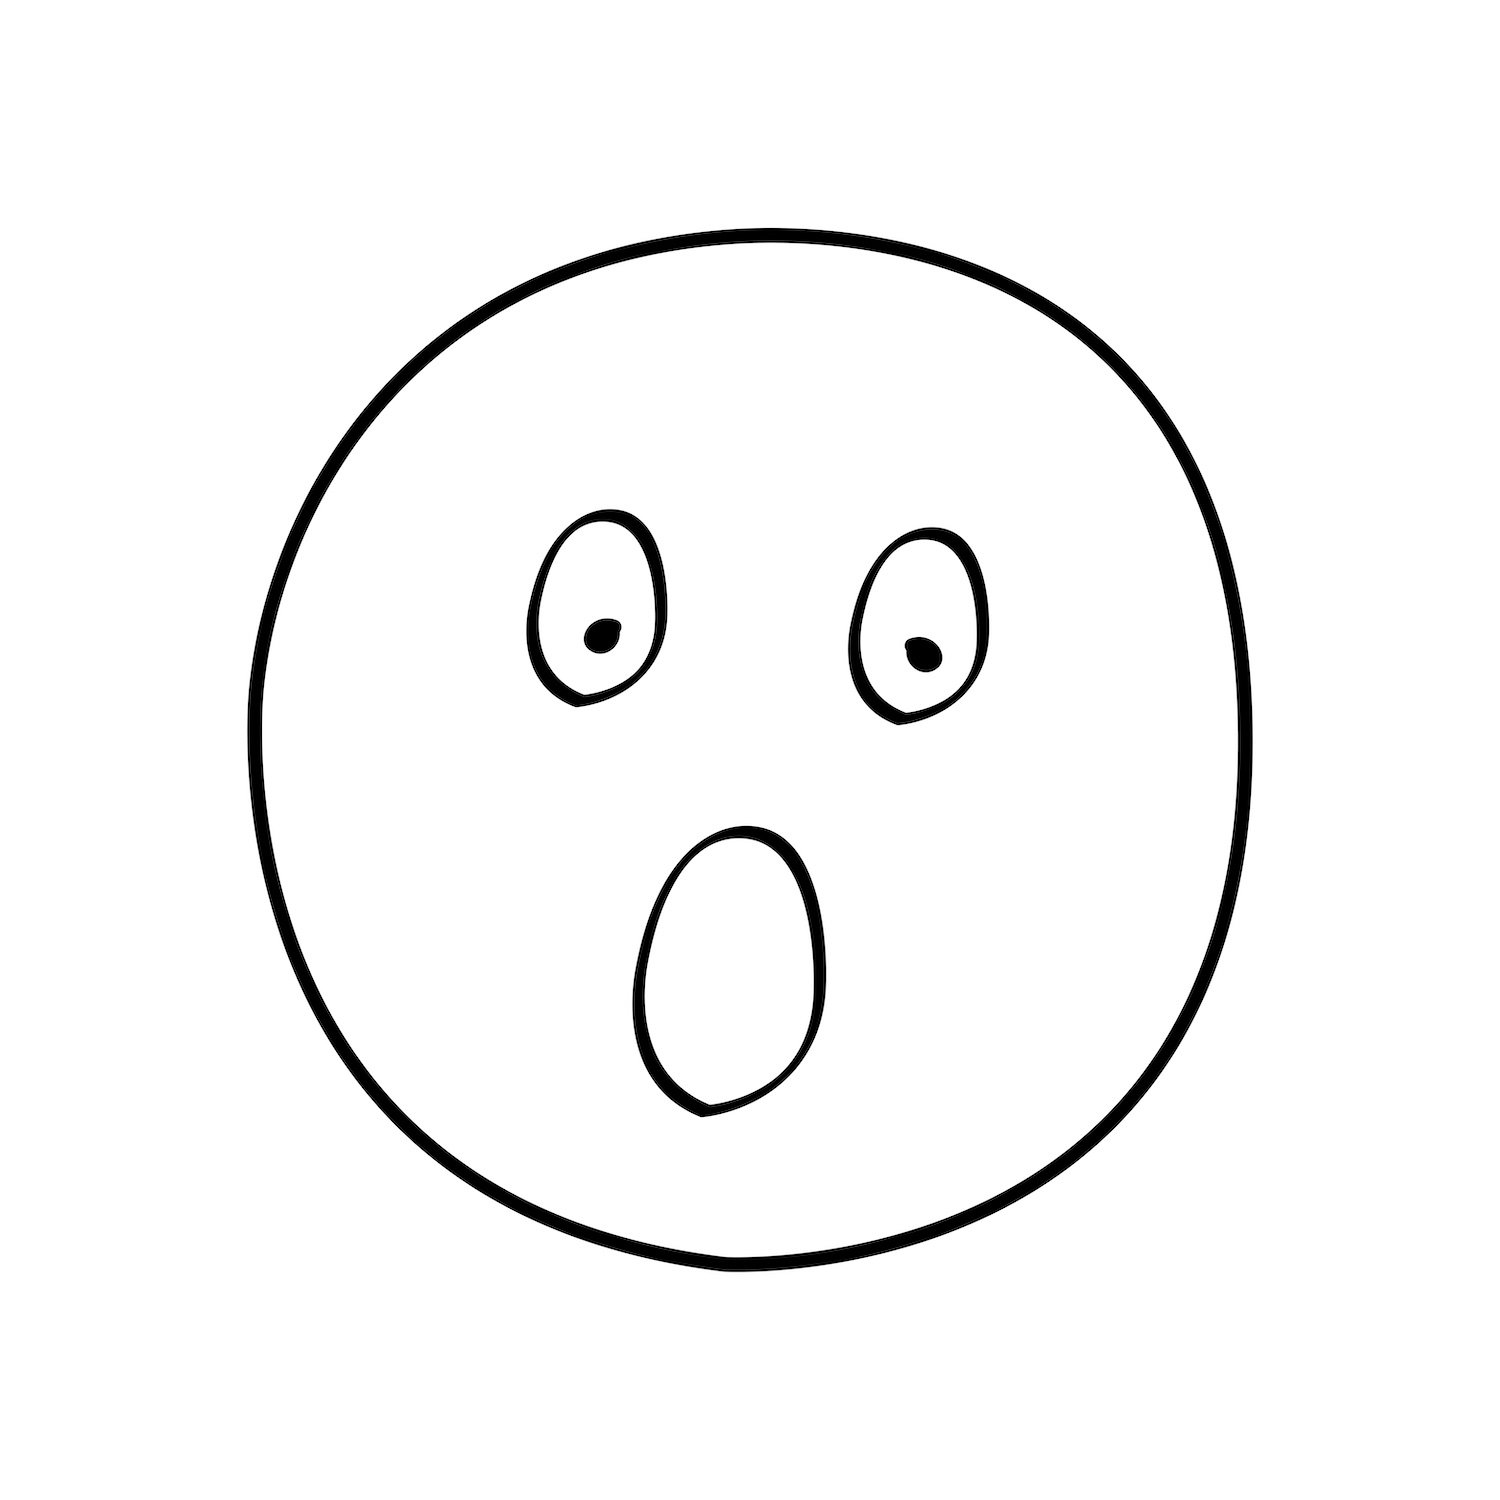
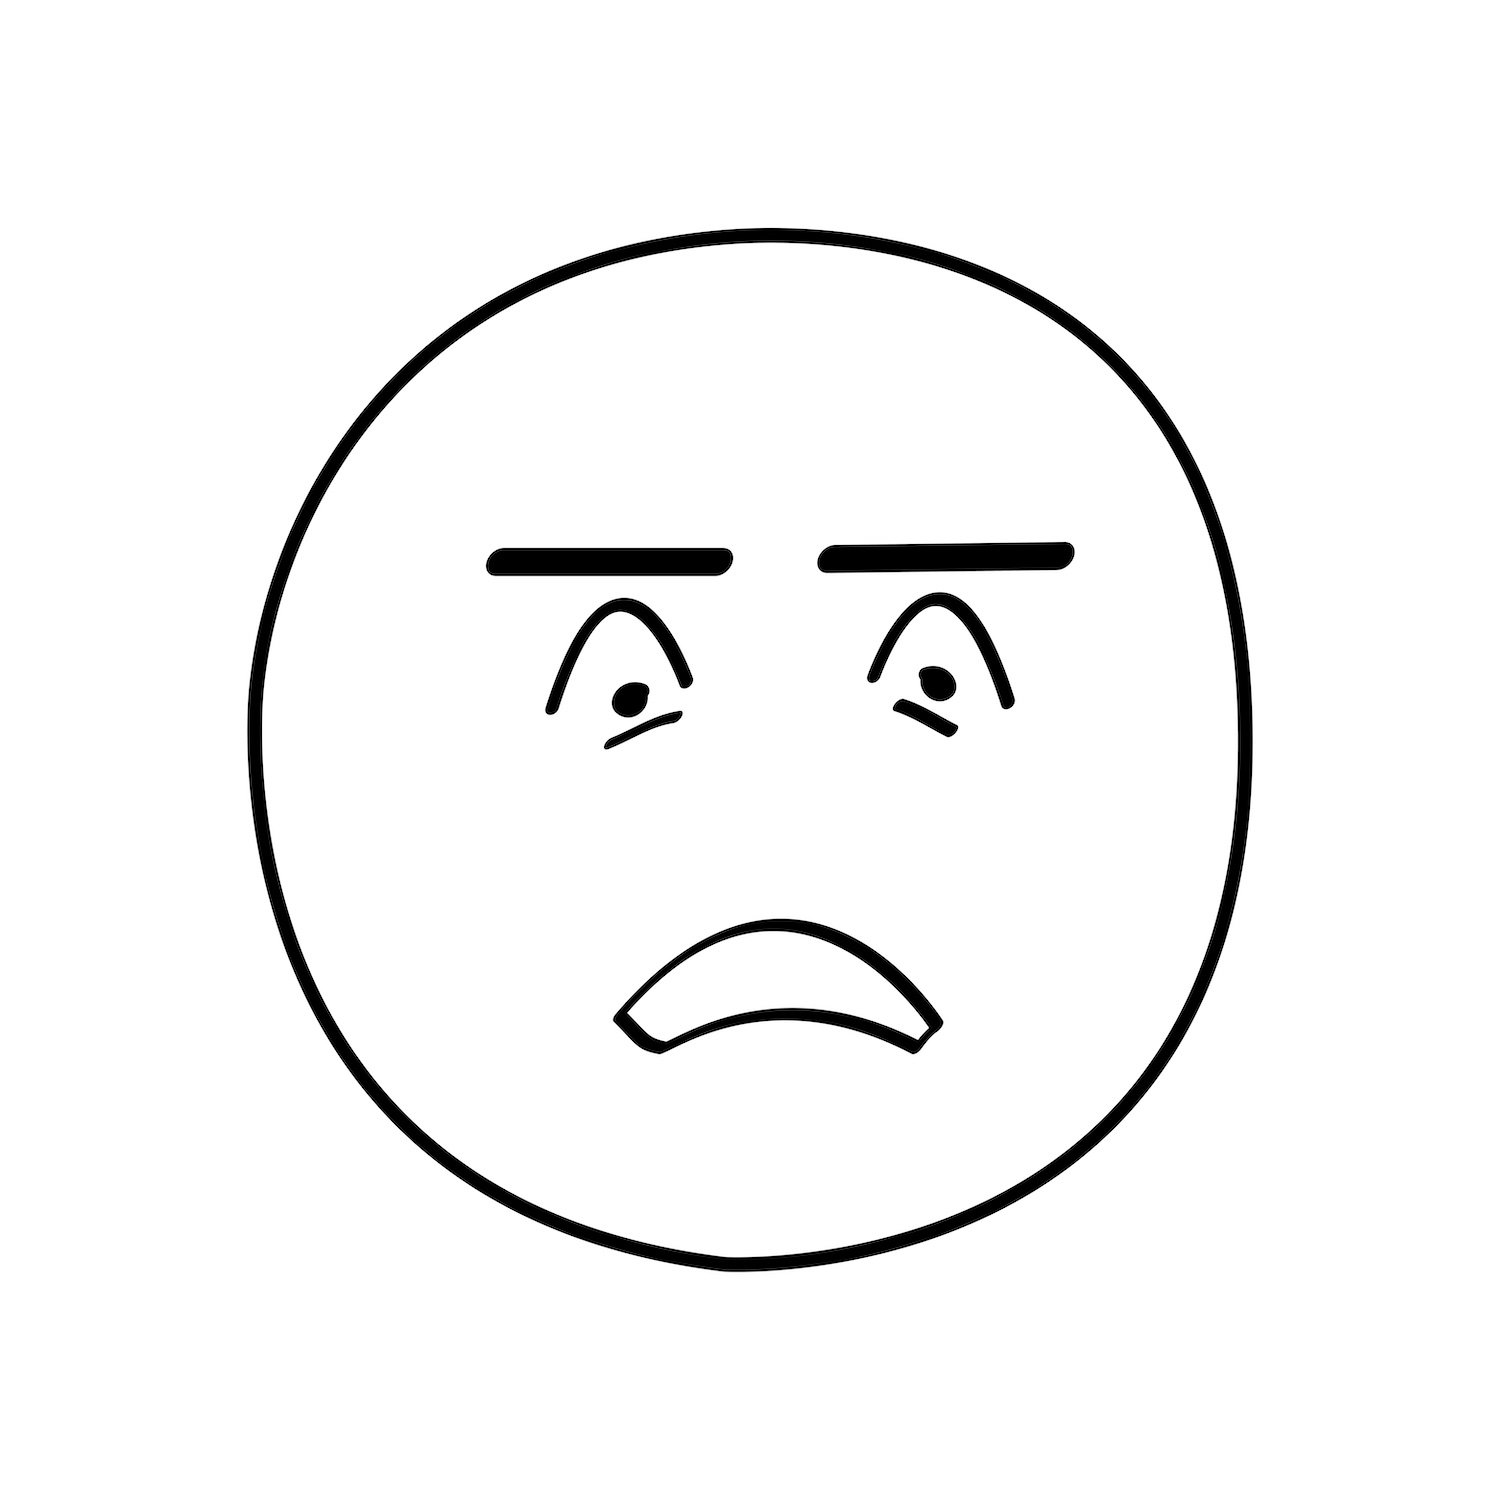
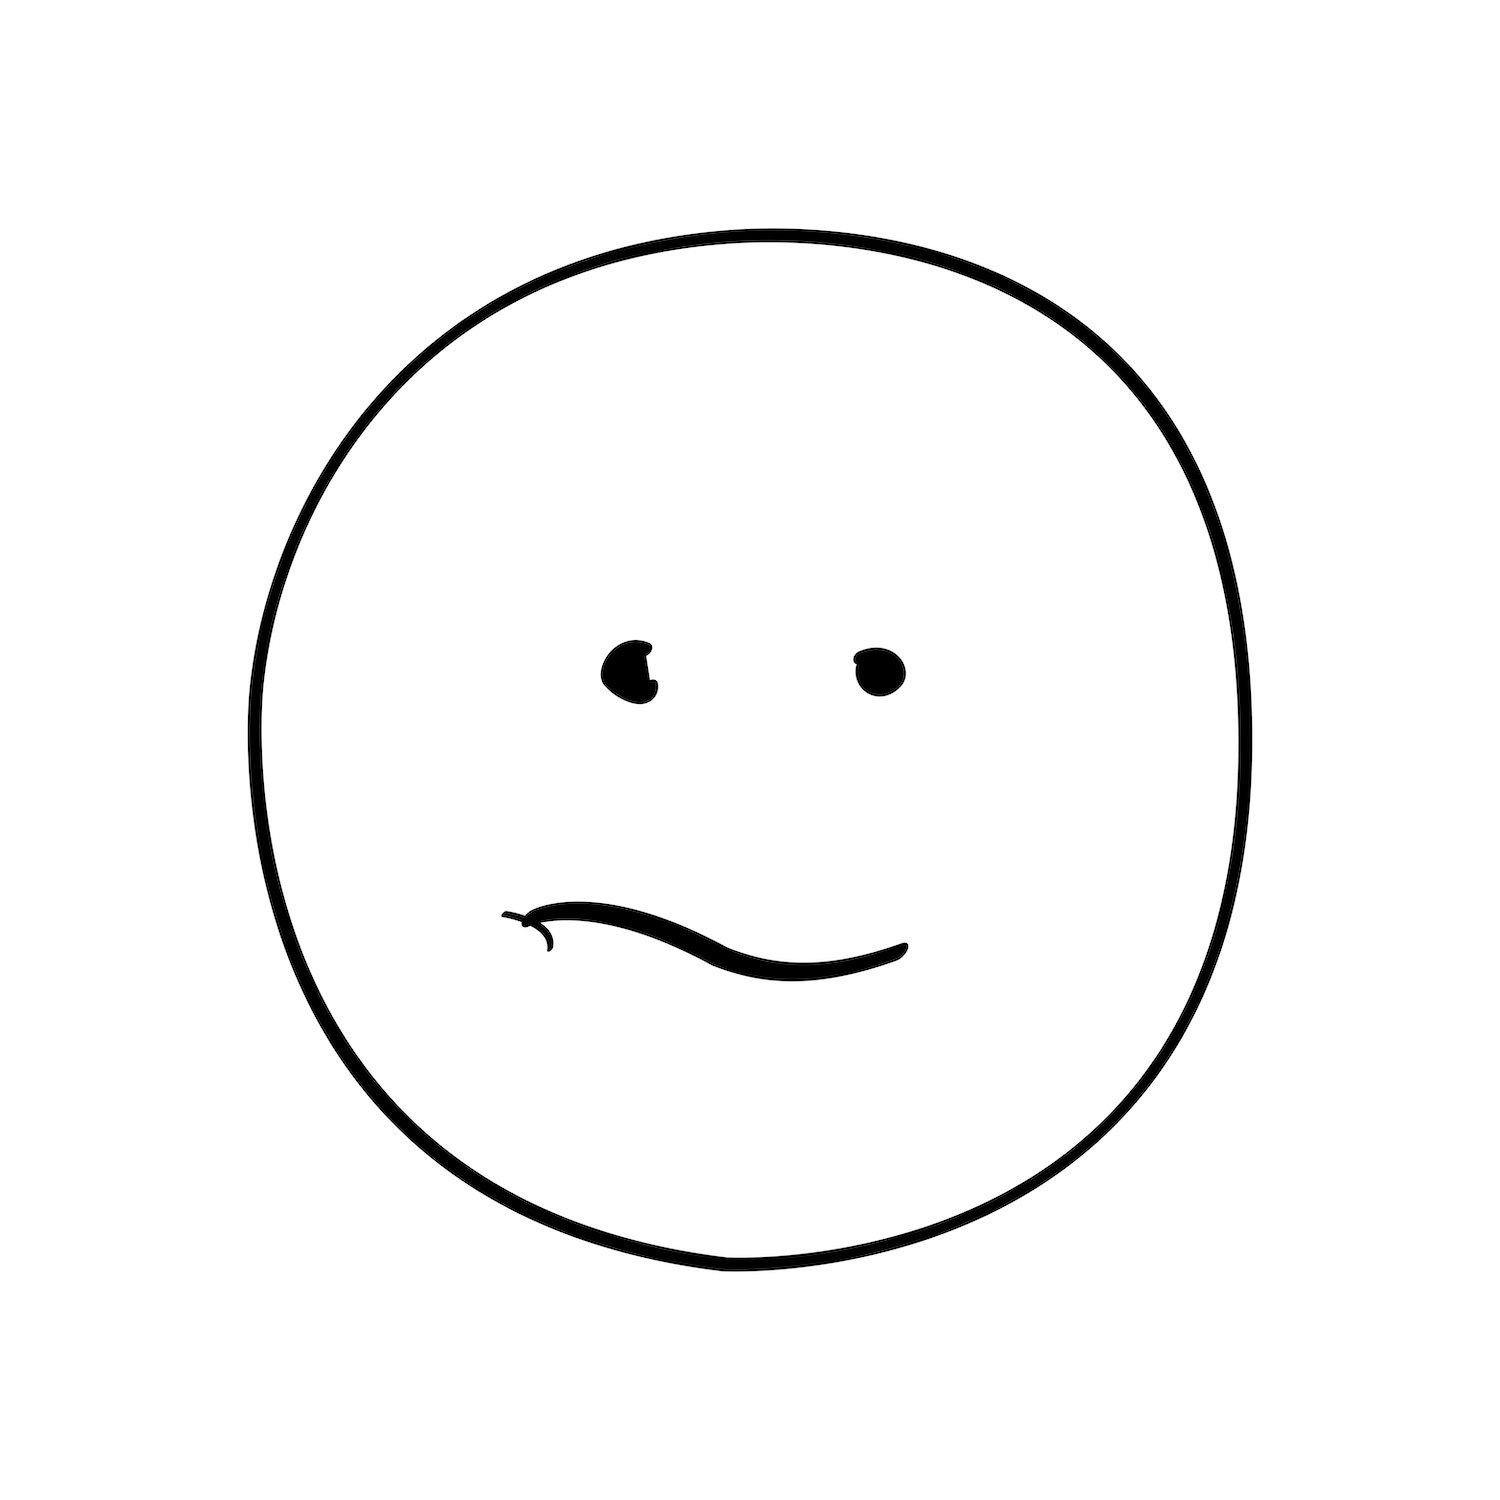
Match the emoji expressions to the emotion
Happiness
Sadness
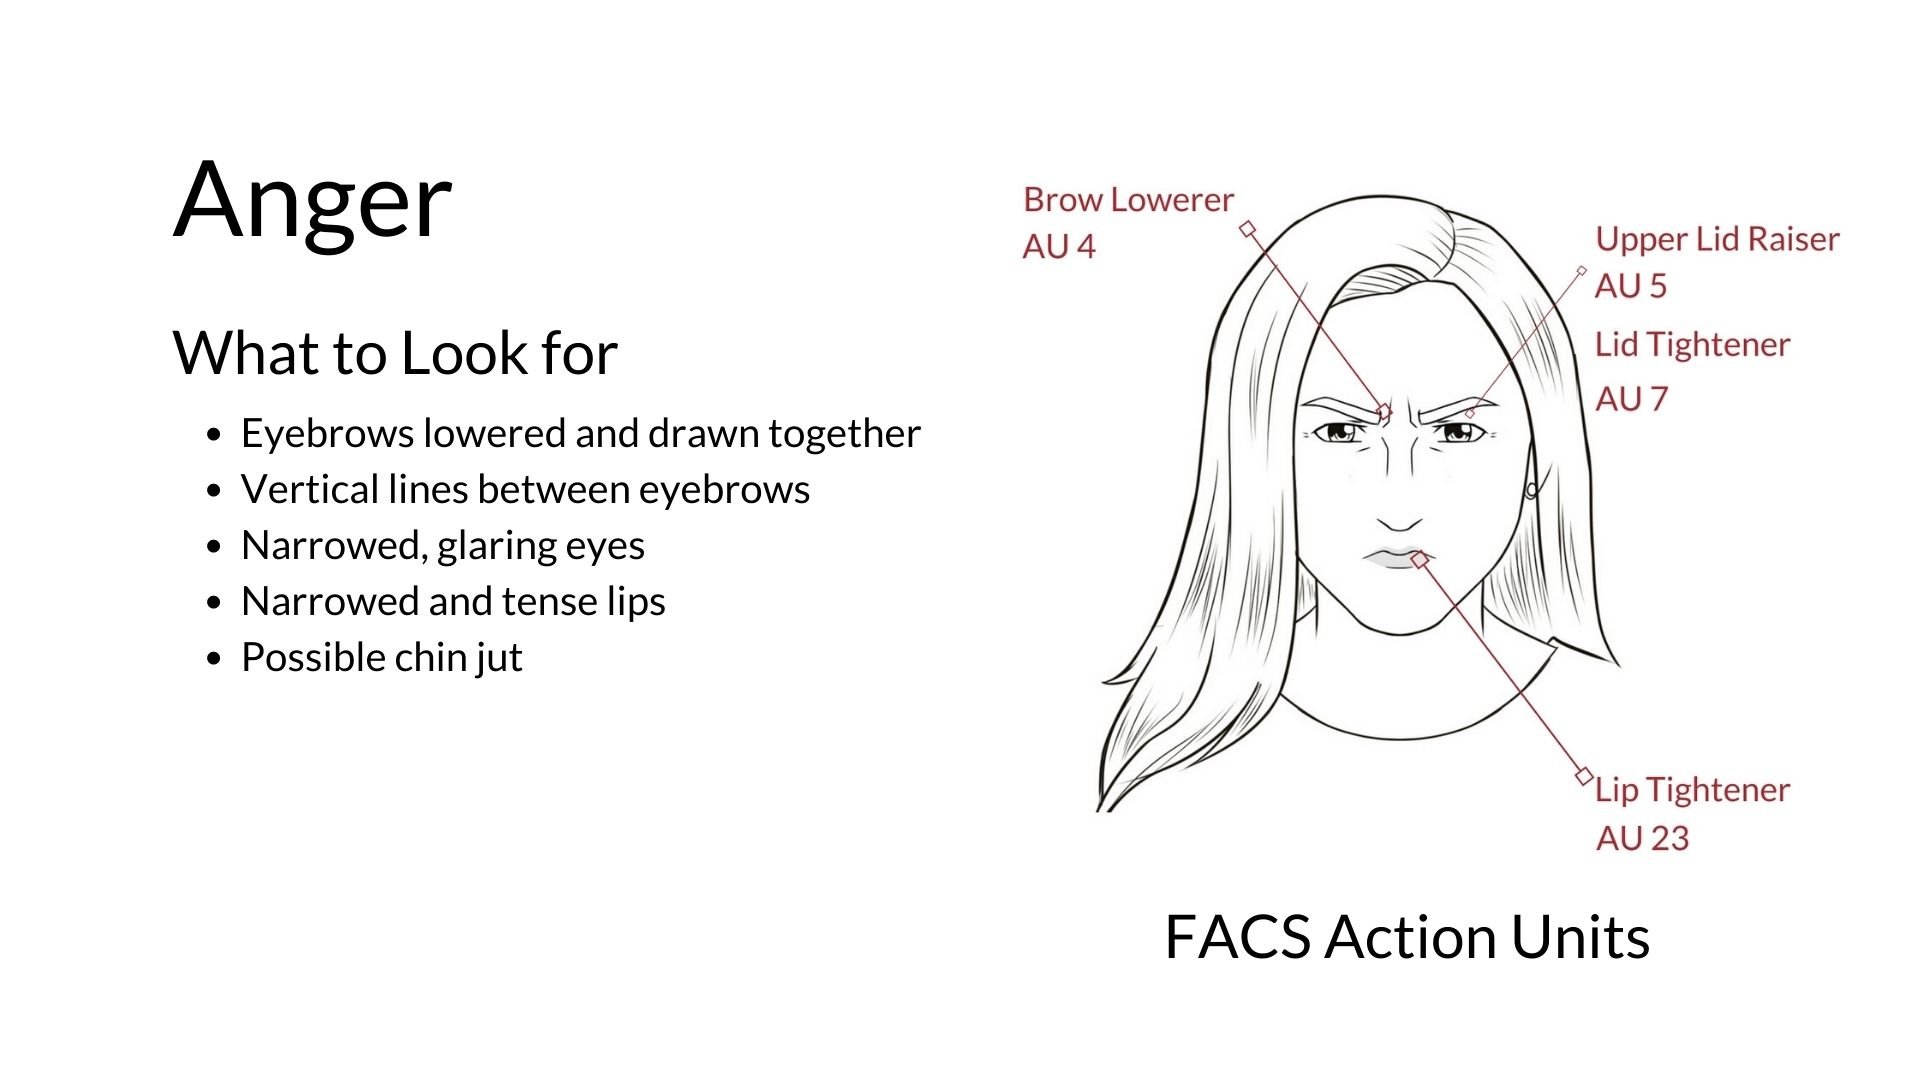
Anger
Surprise
Fear
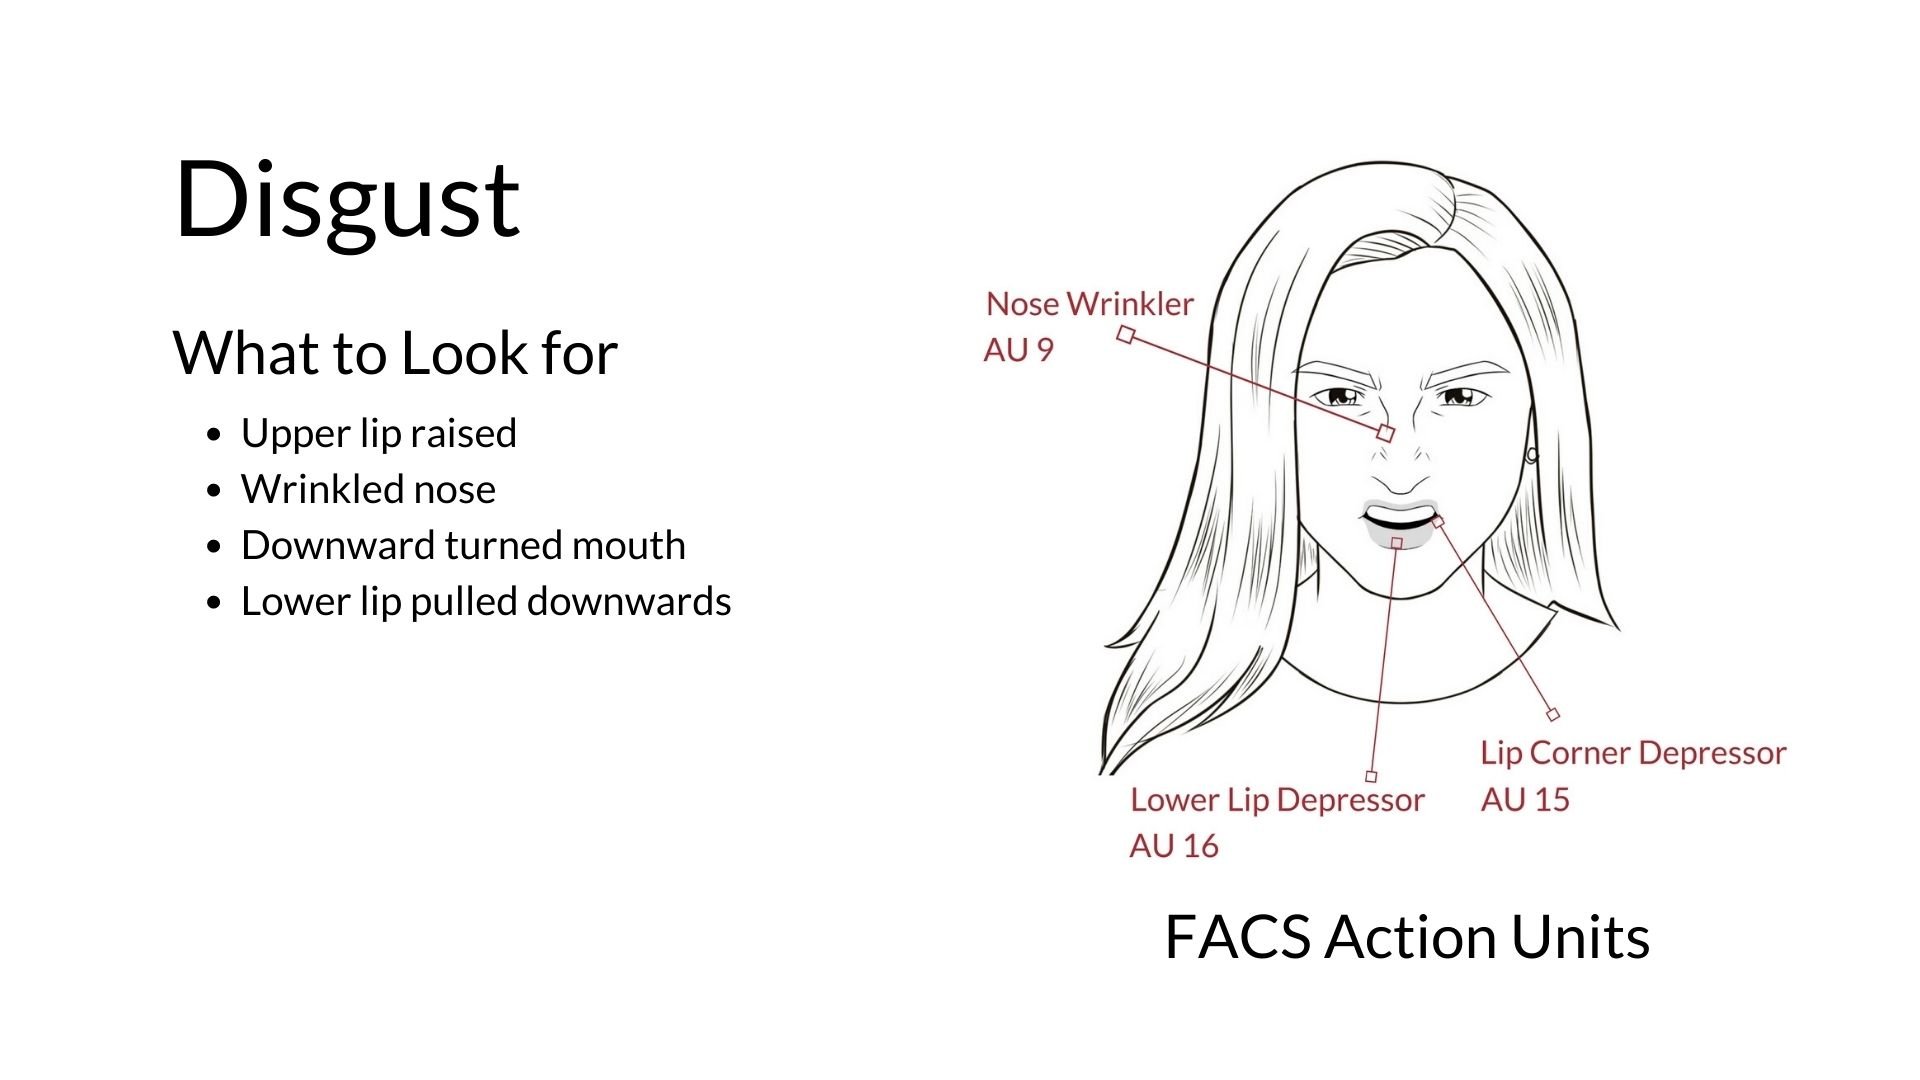
Disgust
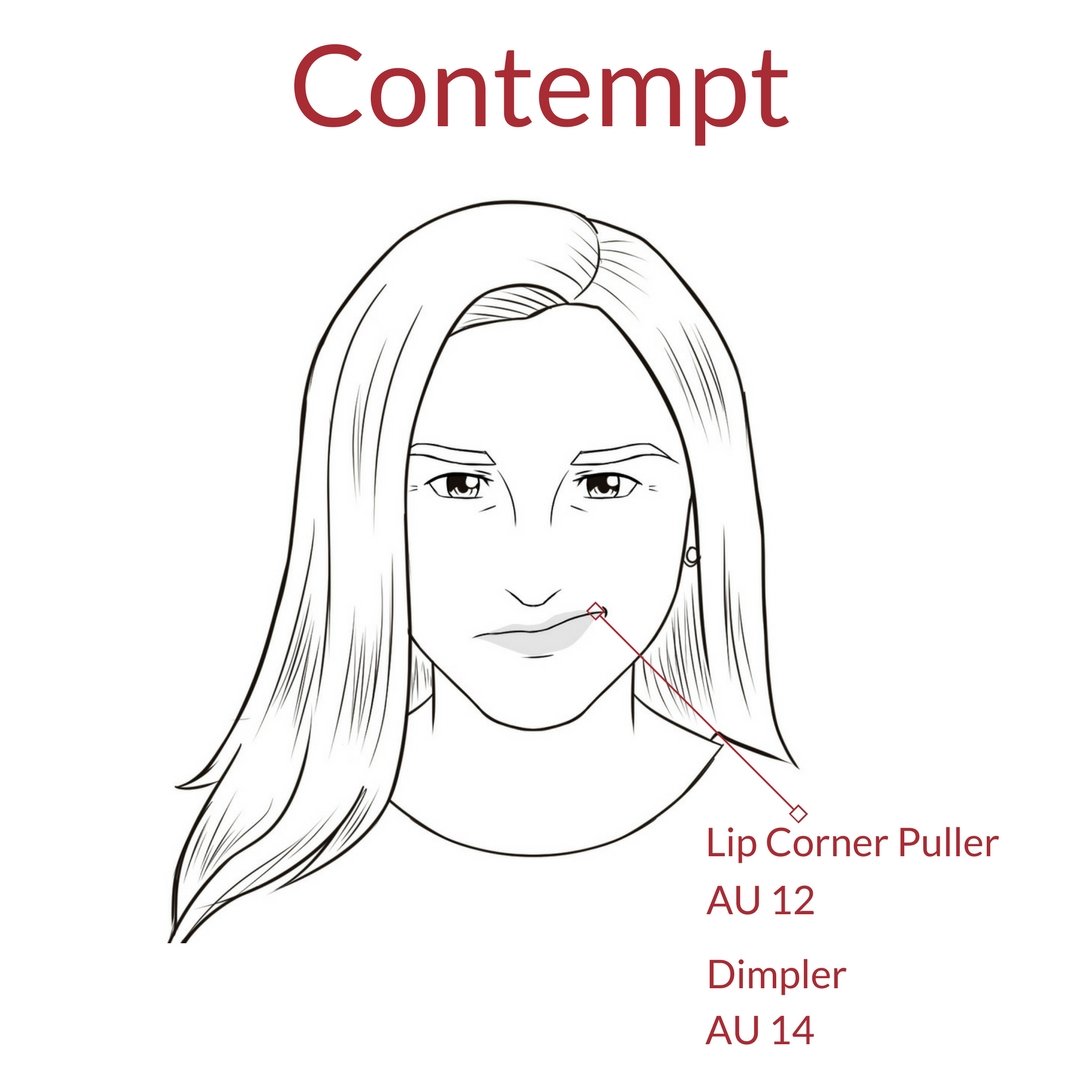
Contempt
😔😮😏😠😁😧
One emotion isn’t shown as an emoji–which one is it?…
The missing emoji was disgust. I left disgust out because emojis usually don’t have a nose, and disgust is seen mainly in the nose. Designers tend to depict disgust with the emoji vomiting because when we feel disgusted, we often feel nauseous. 🤮
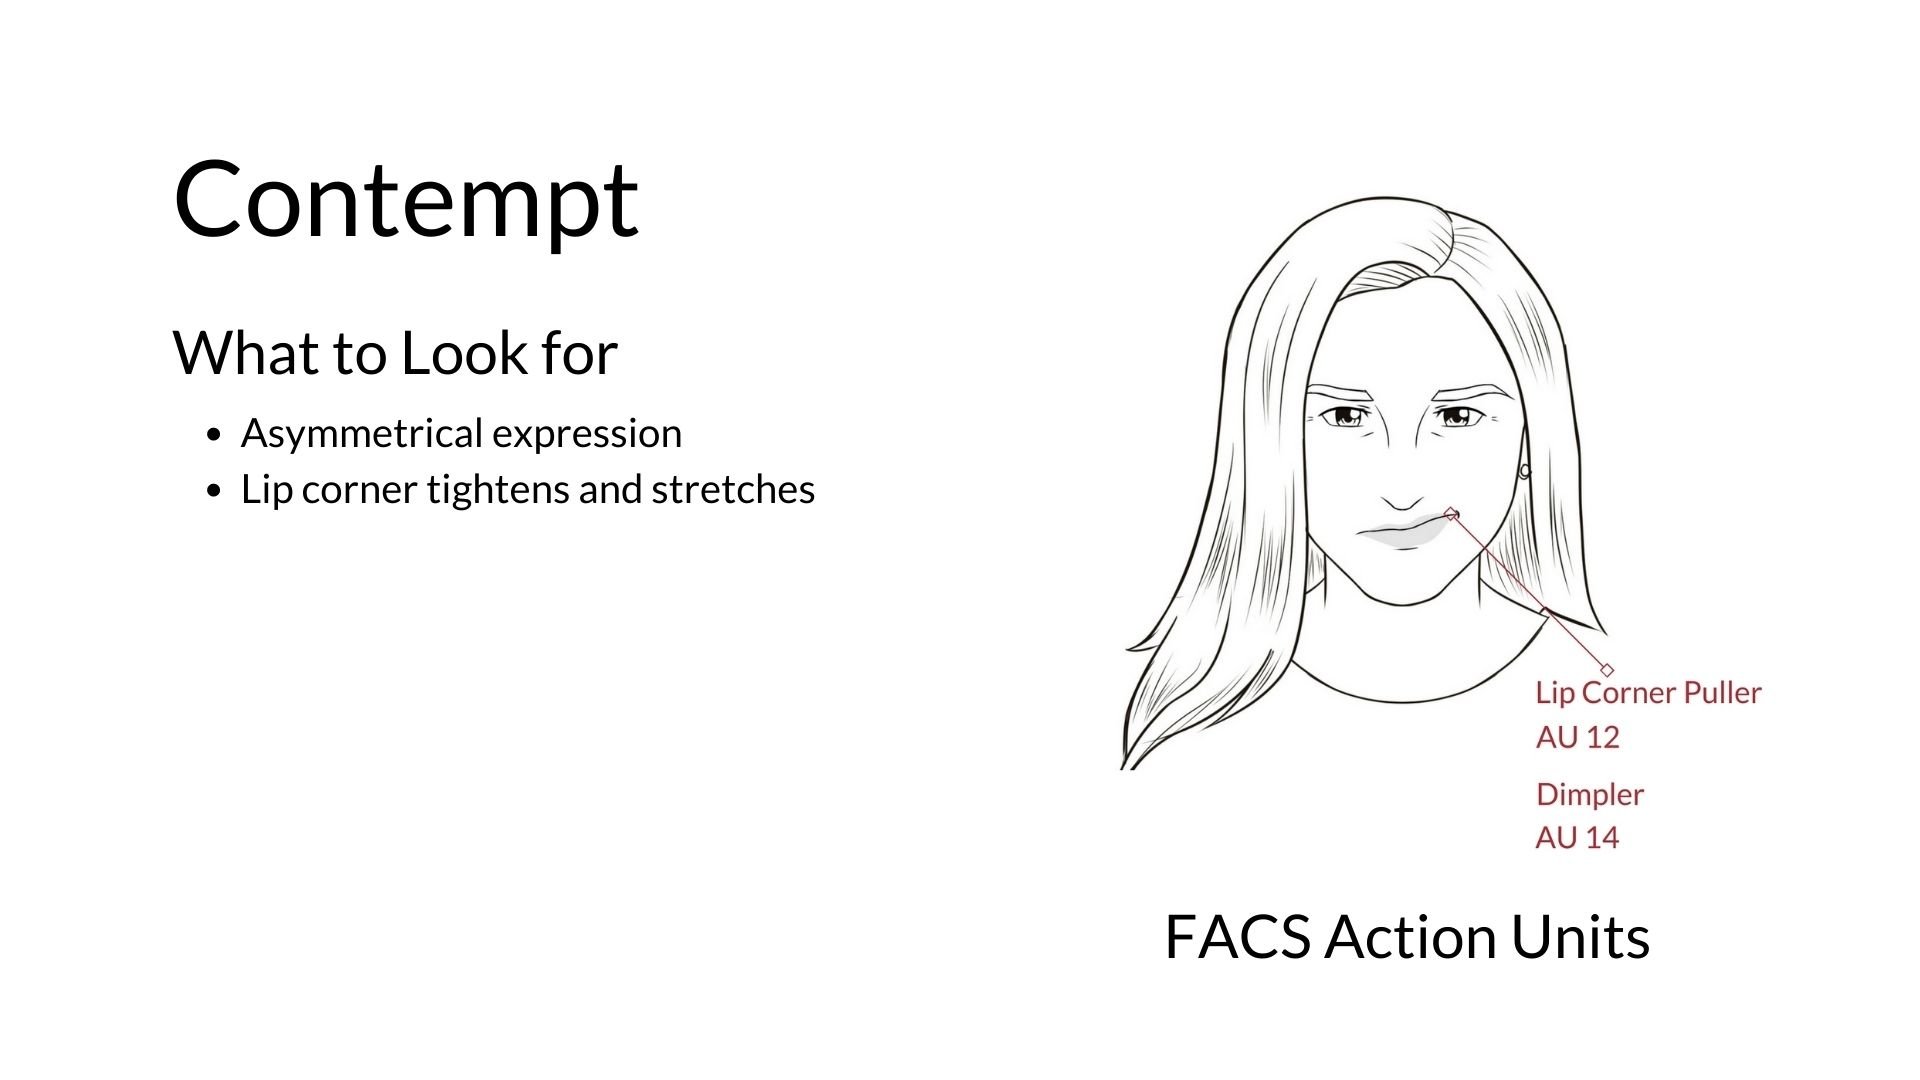
CONTEMPT
You probably already understand most of the emotions mentioned and how they feel.
Many people are less familiar with the emotion of contempt, which is a dislike of someone or something. It's sometimes described as hatred or superiority–where we think we are better than others. Sometimes we express contempt towards ourselves when we mess something up.
Step 4
Draw Your Emoji
Drawing (and writing) help cement learning, so your challenge is to design an emoji that expresses each of the seven emotions.
The descriptions in the diagram below will help you design an accurate representation of the expressions.
Design a simple emoji for:
Happiness
Sadness
Anger
Surprise
Fear
Disgust
Contempt


Part Two: Creating an Emotional Expressive Face
This section is more of a tutorial for people who want to sculpt a facial expression with clay. I’ll share the basic techniques I use when sculpting expressive faces out of clay.
YOU WILL NEED…
Clay
Plastic bag/sheet–to protect the table and prevent clay from sticking, use fabric if you don’t have plastic.
Newspaper
Bamboo Skewer–my most used clay tool; use a pencil if you don’t have one.
Chopstick or a pencil–to use as a clay tool
Rolling Pin
Spray bottle with water
Piece of wire or strong string/thread–to cut the clay
Optional–additional clay tools (see images below)
Mirror
Get creative with waste; many household items can be reused as equipment.

Tools for clay can be collected from around the home. I keep and reuse odds and ends for clay tools and other creative projects.

I wash and reuse plastic bags for many purposes, including clay work.
TIP
Don't try to create your own face or the face of somebody specific. The purpose of this session is to capture an emotional expression and learn more about what emotion looks like. If you also try to capture a likeness to somebody specific, it adds a new challenge, making the project harder and taking away from what we're trying to learn.
Let your creation guide the face's final look, whether it's male, female or otherwise.
When I make clay faces, it's as though I'm creating a character. By the time it's finished, I feel like I know the person behind the face and understand how they feel.
Step 1
Decide which emotional expression you’d like to capture.
Step 2
SEARCH FOR IMAGES
It’s helpful to look at images of different people expressing the emotion you are trying to capture as you create your sculpture. But make sure that these are accurate representations of the expression. For example, if you’re creating happiness, make sure the people in the images are smiling with their eyes.
When searching the internet for images, type: ‘universal expression of (insert emotion)’.
• Have images to hand as you work on your sculpture.
• It’s also helpful to have a mirror to express facial movements on your face. Then study and sculpt the wrinkles and bulges which occur as a result of expressing the emotion. For example, wrinkles on the forehead look different depending on the emotion you express.
Step 4
Cut the Clay

Use a wire cutter to cut the clay. If you don’t have one, a strong piece of cotton or plastic thread should work.
Step 5
Roll the clay
• Use a rolling pin to roll out the clay slab. Aim for an even thickness of around 8 - 10 mm.
• Don’t worry about the shape for now, but make sure the height is more than the width. Excess clay is useful later and can be tucked under to form the shape of the face or trimmed if not needed.
• If you need to, you can add more clay at the edges later.

Facial Proportion
Art has many generalised rules about proportion (size and spacing) in the human face. However, none have proved correct in everyone–nor in many people.
Researchers measuring human faces have found that the 'Facial X' and the 'Facial Triangle' are the two principles that come closest to being a rule.
You can use these as a general guide to the spacing of facial features as you create your clay face.
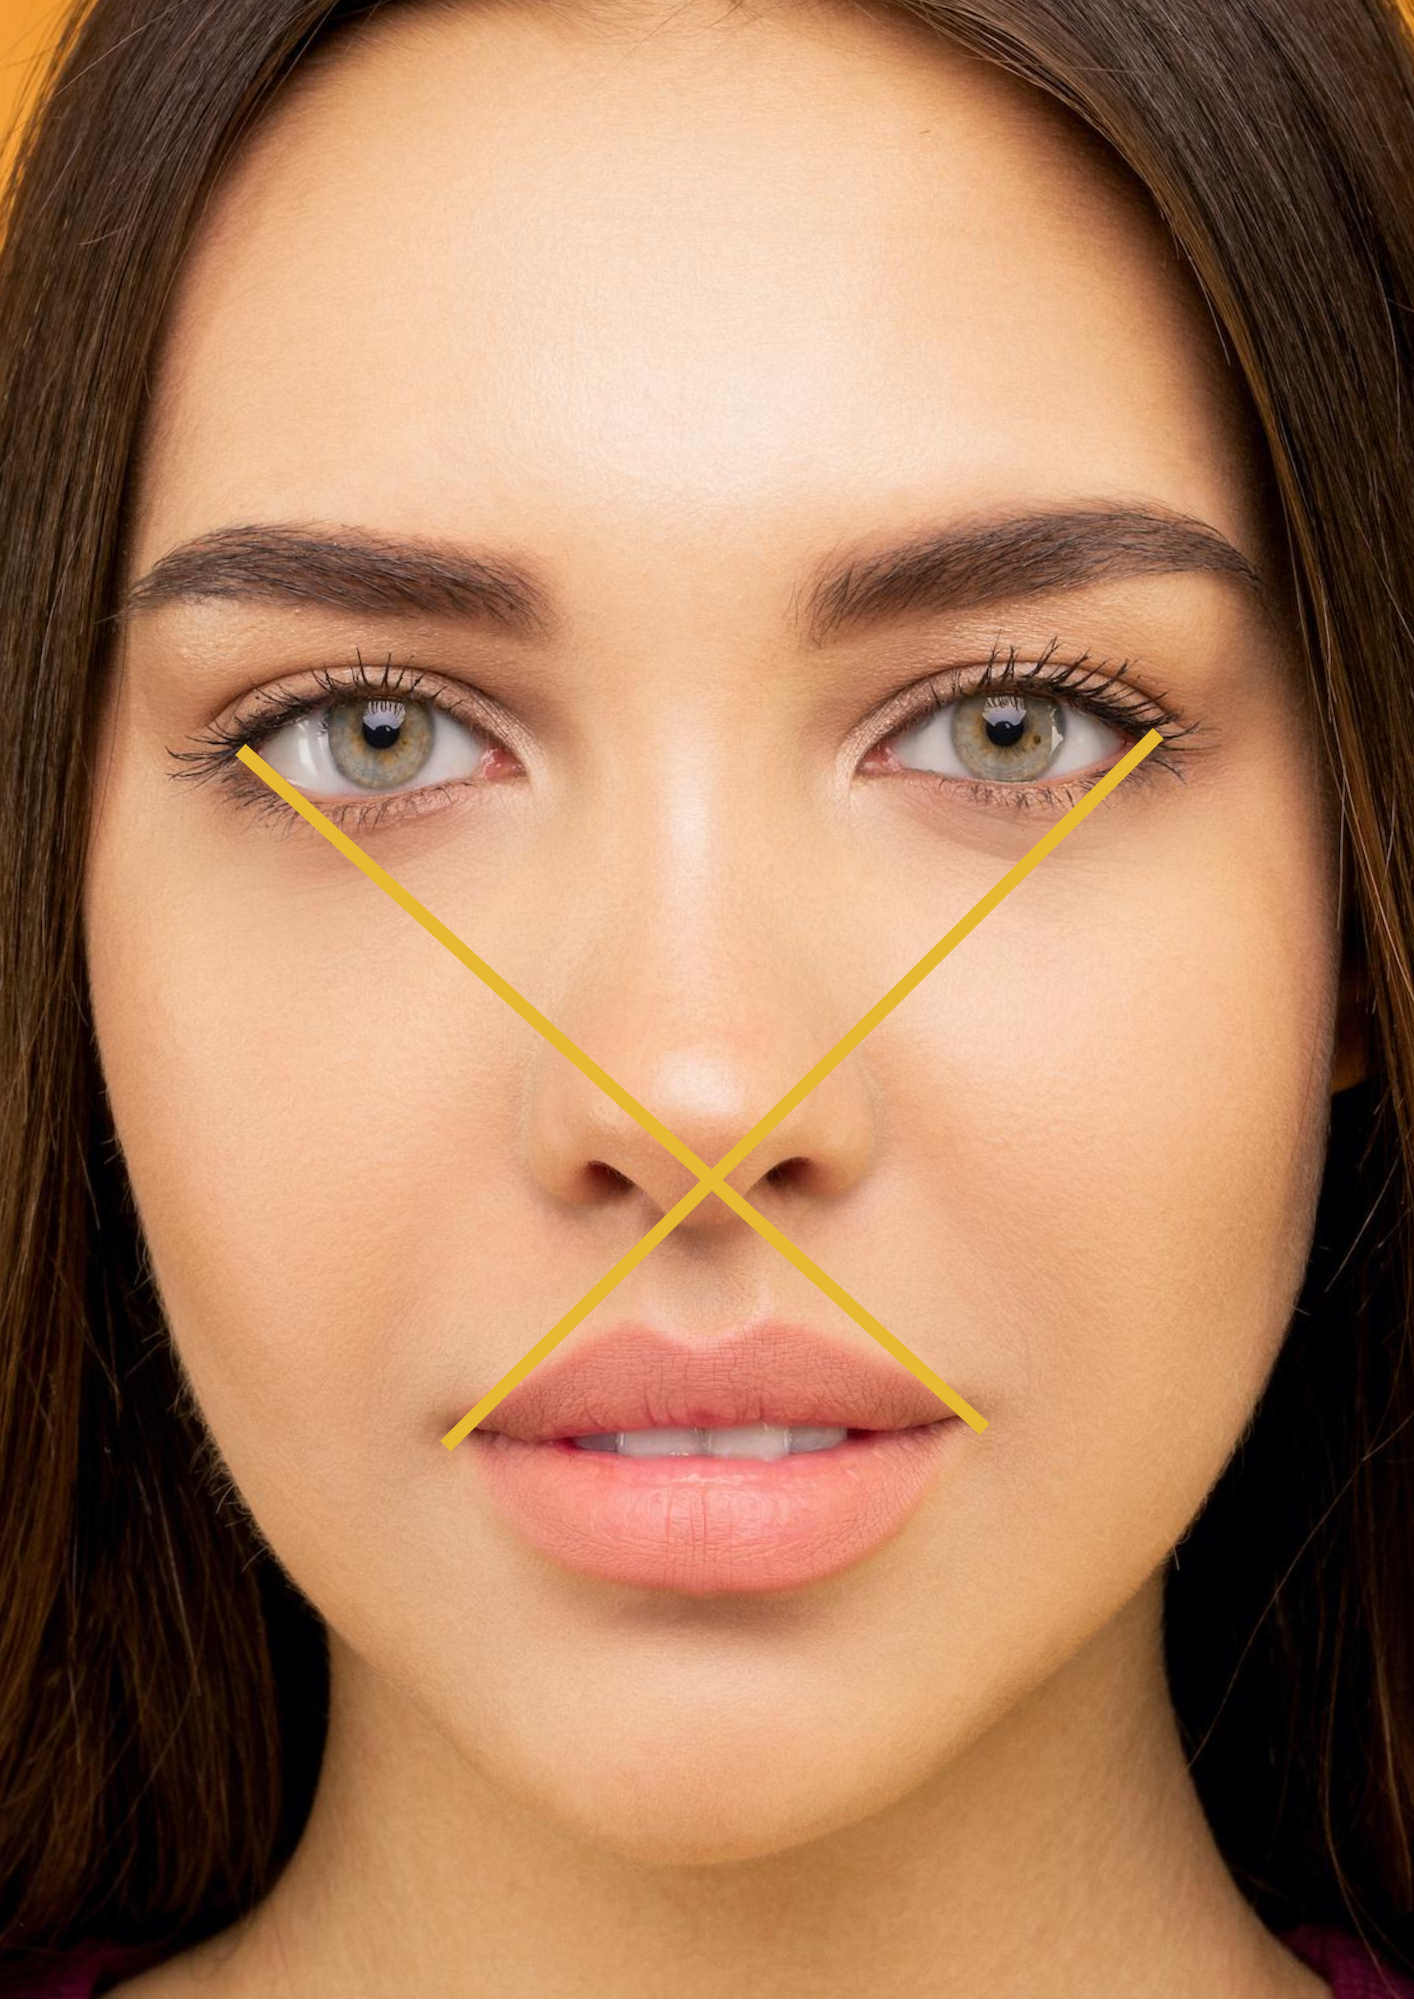
Facial X
Two lines run from the eyes' outer corners to the mouth's outer corners, crossing at the base of the nose.
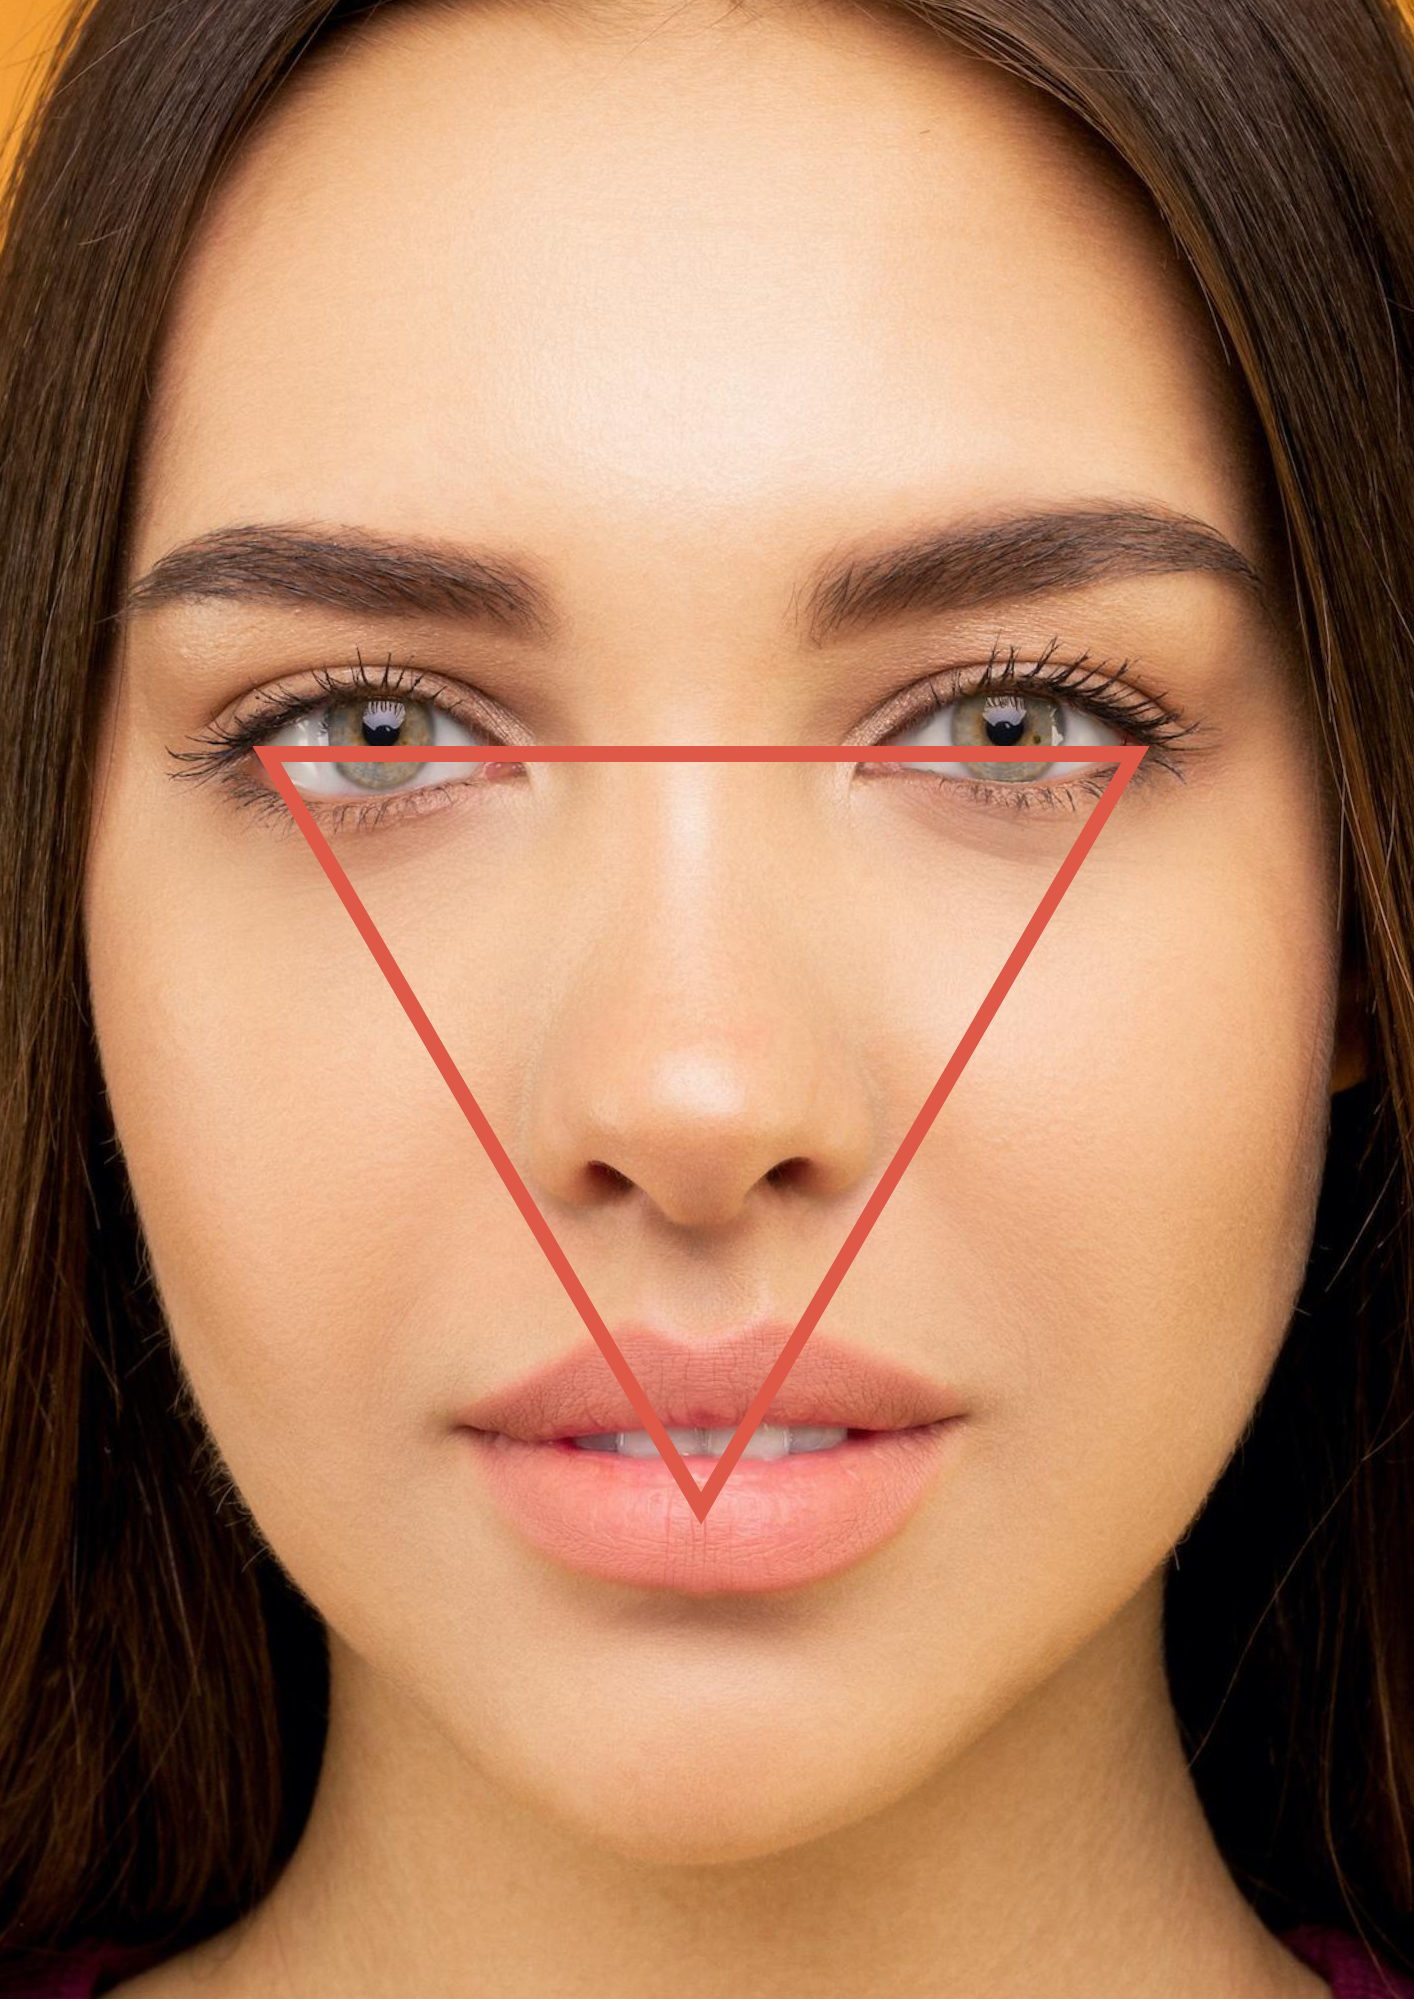
Facial Triangle
The corners of an equilateral triangle touch the eyes' outer corners and the lower lip's centre.
Step 6
Start your Clay Face
I don’t have a video of this; however, I have a video tutorial using the same technique with a clay gargoyle.
The key to creating a face is to keep moving from one area to another, working on different features for a short time and then revisiting them repeatedly instead of working on one feature until it’s perfect. When you do this, the face forms as a whole and any mistakes with proportion can easily be fixed.
Your sculpted face might take longer to look good, but you end up with a better result. Don’t be disheartened if your clay face doesn’t look good until closer to the end of the project; this is normal.
This Video shows the making of a gargoyle, following the same steps.
Watch the time-lapse videos below, showing how I create expression.
Notice the following in the first video:
My phone was visible (bottom left) as I made my sculpture. I’d searched online and saved many images of people smiling beforehand (with clean hands). I used different images at different times to help me create the face. When I was working on the mouth, I used an image which displayed a happy smiling mouth; when I worked on the eye area, I used a different image. Remember, this exercise aims to learn more about facial expressions through sculpting.
There’s no need for expensive sculpting tools. My fingers are my most used tools. I also use a wooden chopstick, a bamboo skewer/cocktail stick, and a clay modelling tool.
I move from area to area, working bit by bit instead of perfecting a single area simultaneously.
Start your Clay Face
○ Mark out the features.
○ Place newspaper behind the clay slab to form raised areas like the cheeks, forehead and chin.
○ Begin to build facial features like the eyes, nose, mouth and eyebrows.
○ Work on all the features until you’re happy with how they look, then smooth the clay where the face should be smoother and add wrinkles where needed.
Other Helpful Videos
We’re back to the gargoyle videos here, but it’s the same techniques to smooth and shape the face.
Smoothing the Clay
Shaping the Face
Finishing your Work
It's okay to finish off your masterpiece later.
To keep the clay soft and workable, wrap it in a plastic bag, ensuring it's sealed or tucked under so that moisture doesn't escape. Your clay sculpture should remain workable for a few days. To extend this time, open the bag every few days and spray the clay with water.
If it dries out too much, the clay will become unusable.
In-Person Workshops and School Incursions
School Incursions in Perth, WA
I run workshops like this in person, in schools and with adults. If you’re a teacher in Perth, WA and would like a workshop in school, check out the details here.
Adults in Perth, WA
If you’re an adult in Perth, WA, if I have any of these upcoming workshops, they will be listed here. Check back in the future if none are listed.